Deploying Your Scatter Collection
This guide covers deploying your collection on Scatter.
Step 1: Naming Your Collection
Make sure your wallet is connected.
On the start page https://www.scatter.art/ ↗ select Create in the top right corner.
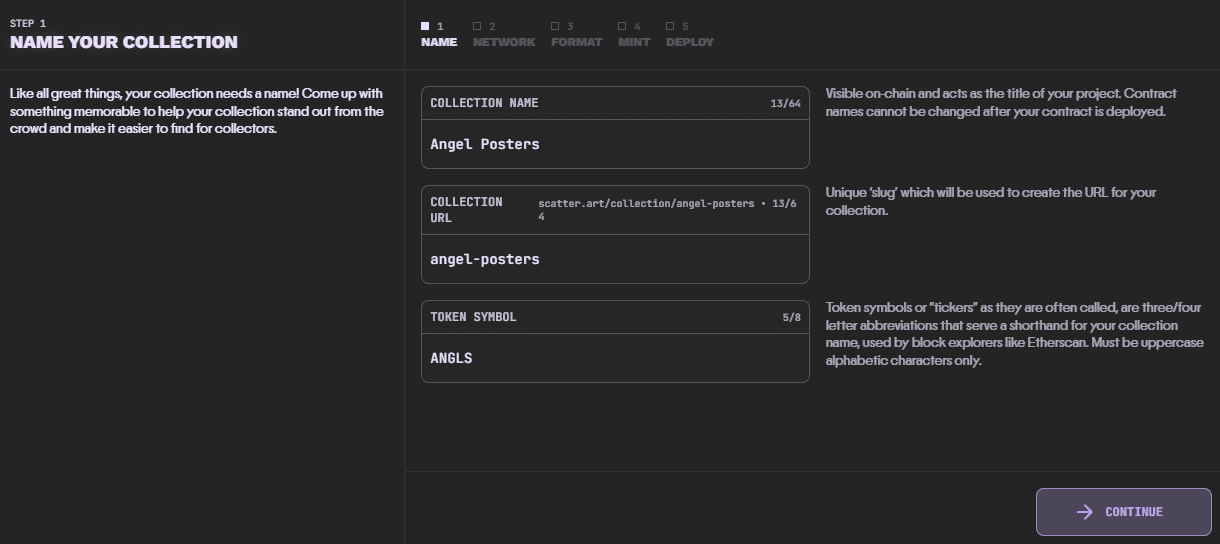
Enter the following details:
- Full collection name
- URL for your collection - this will be used in the link to your collection page on Scatter
- Token symbol - this is the shorthand or "ticker" for your collection, it can be anything but keep it short
Click Continue.
Step 2: Choosing Your Chain
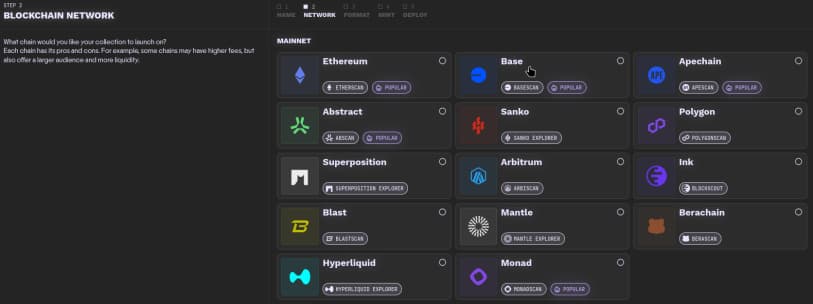
Select the chain you would like to use by scrolling up and down.
Click Continue.
Step 3: Choosing Your Contract Type
Next, select the contract type you would like for your collection.
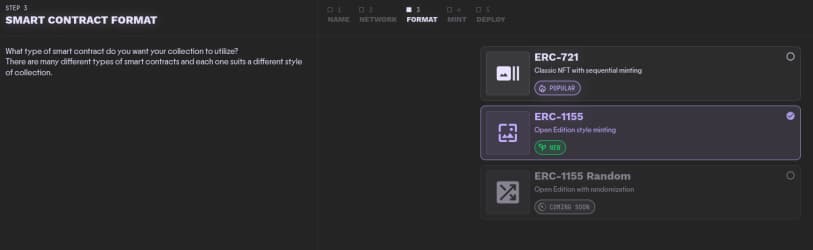
Click Continue.
Step 4: Setting Your Collection Details
There's a couple of details to fill out next. Some are optional. They can all be changed later if required.
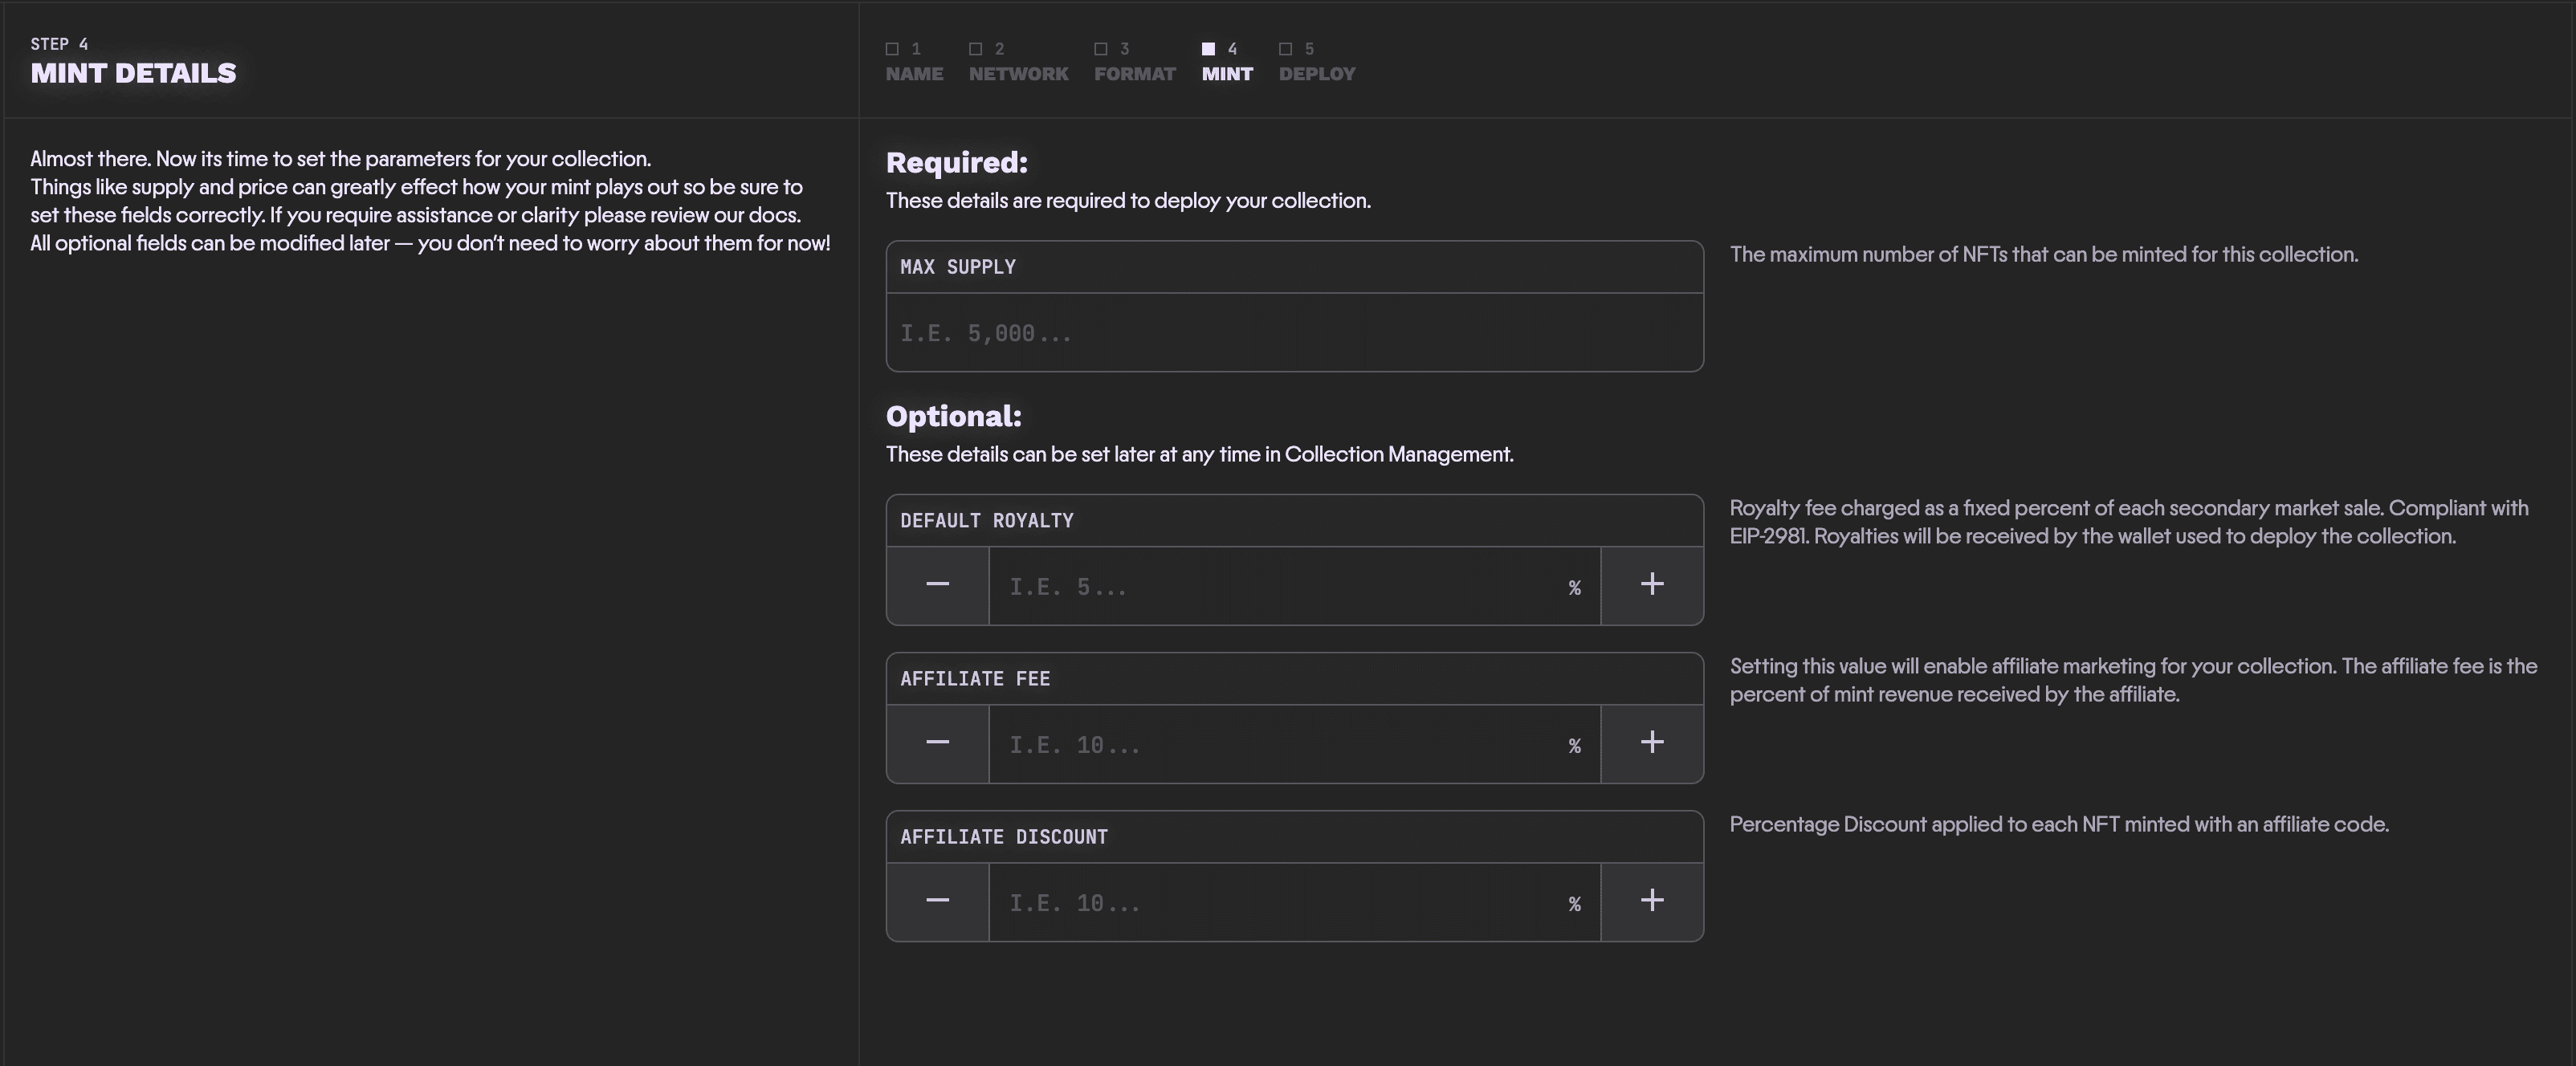
Required:
- Max Supply: The initial max supply of your collection. Can be changed, but can never be lowered below the current highest ID minted.
Optional:
- Default Royalty: This value is used by secondary markets which comply with EIP-2981 to set your royalty % on secondary proceeds. Most markets still allow you to update which address and % you want to use on their sites. The general recommend percent for royalties is 5%. Most secondary marketplaces no longer do royalty enforcement so paying the royalty % will be optional when secondary sales happen.
- Affiliate Fee: You can optionally set an affiliate fee. The max possible affiliate fee is 50%. If you do set a 50% affiliate fee the affiliate will get 50% of the mint price, you will get 45%, and Scatter will get 5%. We recommend setting as high of an affiliate fee as you are comfortable with. Not all projects need the affiliate program enabled, and you can enable it later on if you do not want it enabled initially. If using the affiliate system, you can setup your affiliate program to either be limited to whitelisted addresses or open to everyone. Further configuration will be available in the collection management page after you deploy your collection.
- Affiliate Discount: You can optionally set an affiliate discount. This gives an incentive to use affiliate links by giving the person who mints with the affiliate link a discount of an amount you set. The max affiliate discount is 50%, which lowers the base price by 50%.
Click Continue.
Step 5: Deploying Your Collection
Finally you will get to the last step - deploying your contract!
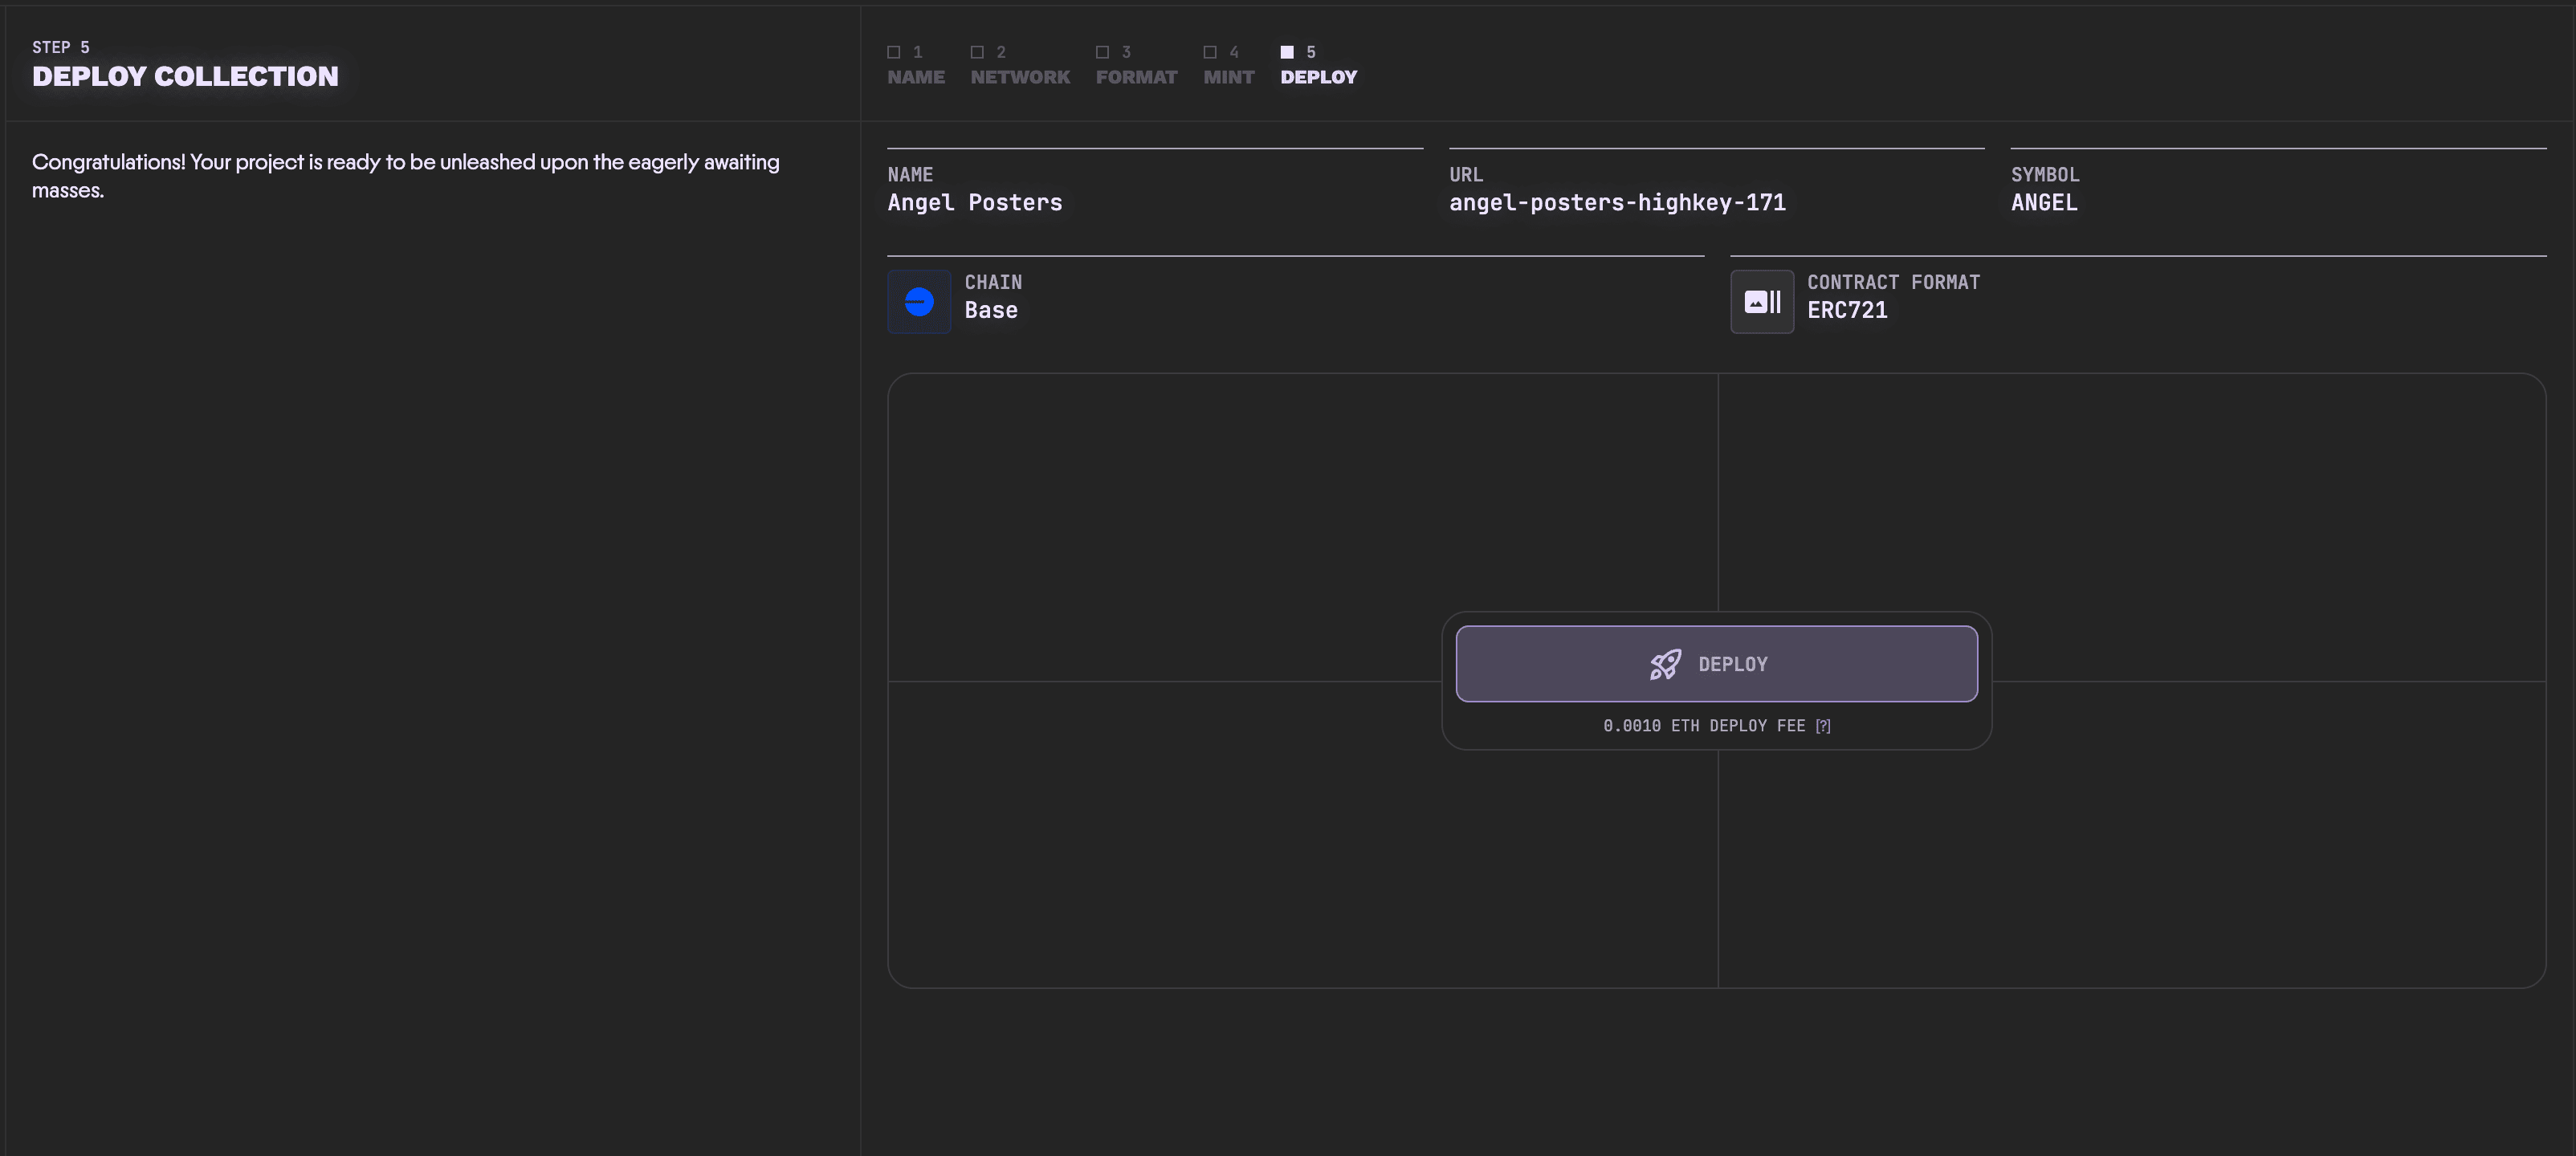
Depending on the chain, you may be required to pay a small fee to deploy your collection.
Click DEPLOY to continue.
Next Steps
Congratulations! Your collection is now deployed on the blockchain, and ready to configure on Scatter! The next steps are to set up your collection profile/branding, upload your content, and start the mint. Follow the next guide to set up your collection profile.