Collection Profile & Branding
Give your collection a recognizable identity with its name, description, avatar, banner, and optional custom theme. First complete Prepare Your Files, which covers media and branding file specifications.
Step 1: Open Collection Editor
Sign in with the wallet Scatter recognizes as the collection's contract owner. For a collection launched on Scatter, open its collection page and select Edit.
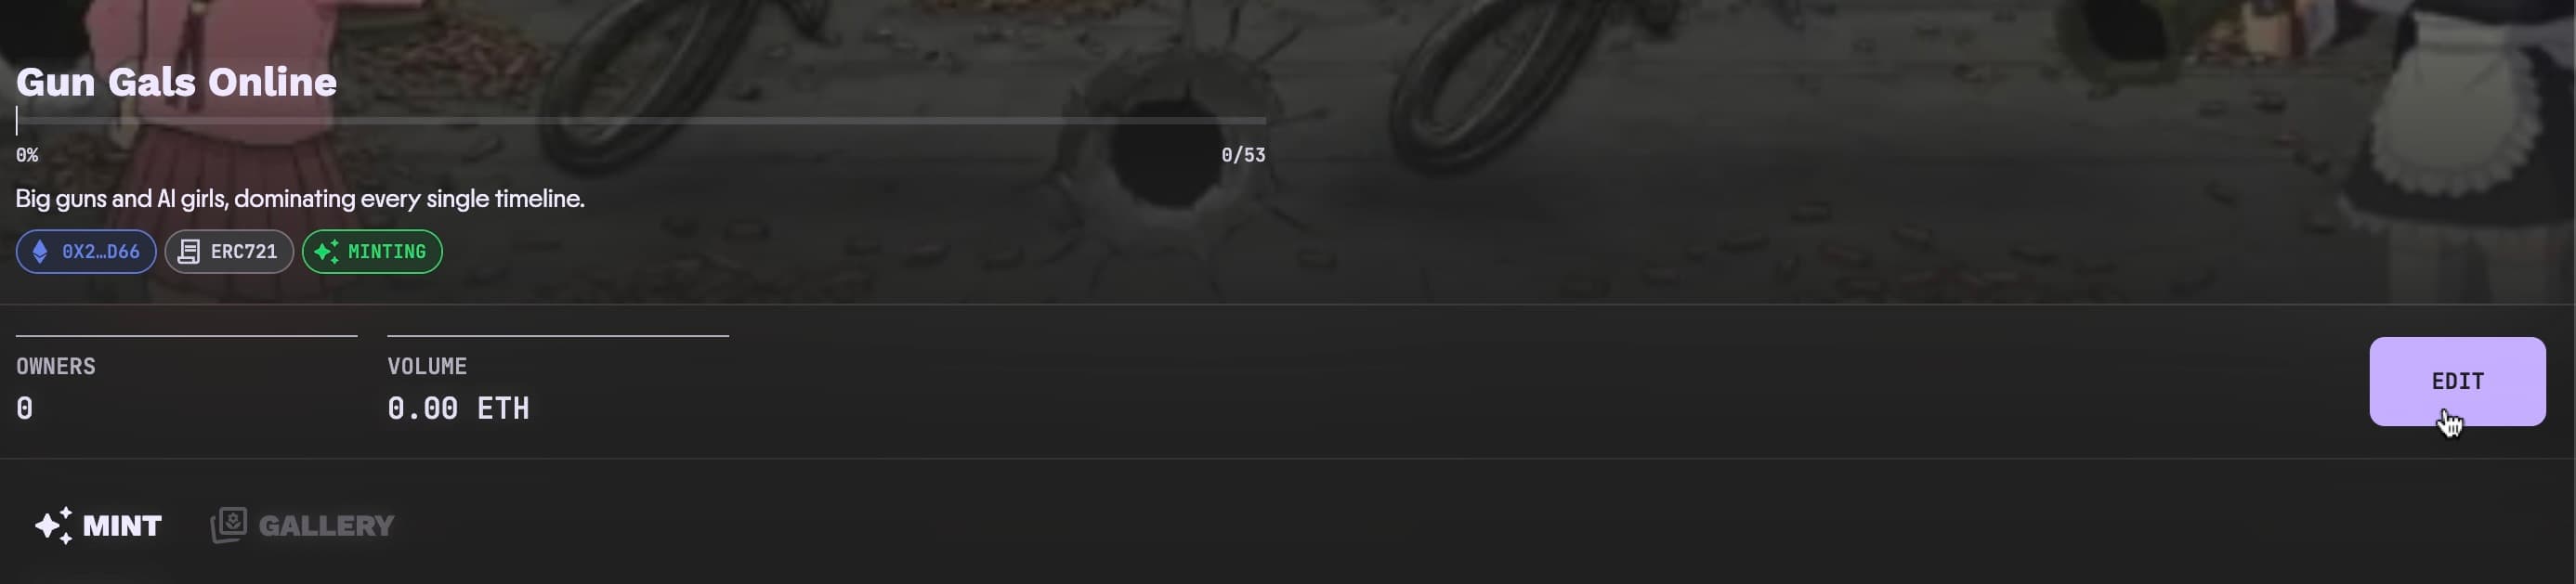
For a collection launched elsewhere, open the editor directly at
https://www.scatter.art/c/<collection-slug>/edit. Replace <collection-slug>
with the slug from the collection's page on Scatter. My Collections
currently shows only collections originally launched on Scatter.
Owners of collections launched elsewhere can edit the collection's display name, description, social links, theme, avatar, and banner. They can also post announcements, change the market currency and other supported marketplace settings, and view marketplace analytics. Contract-specific controls, including payout and royalty settings, require a collection launched on Scatter.
Step 2: Complete the Profile Tab
Under the Profile tab you can set name display, description, links, and collection images.
Set your collection's public identity:
| Field | What it controls |
|---|---|
| Collection Display Name | The public name used across Scatter, up to 120 characters. |
| Collection Description | A public description of your collection, up to 2,000 characters. |
The display name can be edited here. It is separate from the on-chain contract name and symbol, which cannot be changed after deployment.
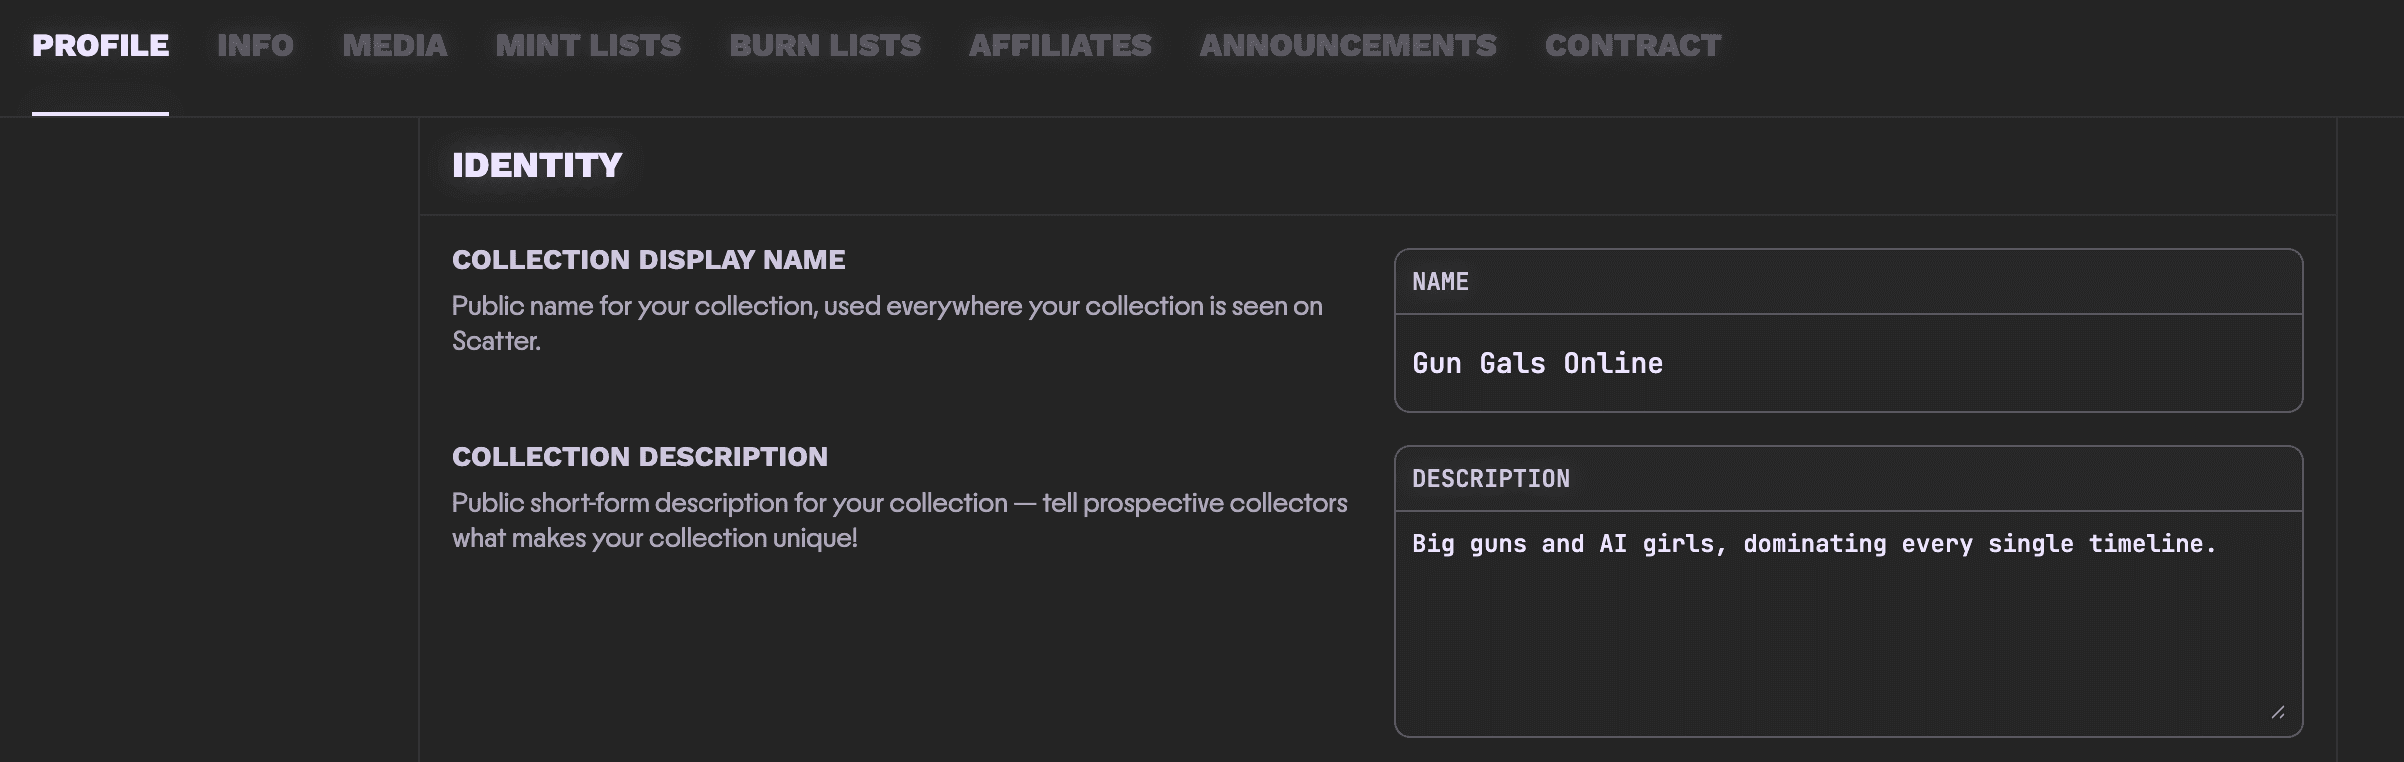
Next, upload your Avatar (the small collection thumbnail) and Banner (the wide collection image). Both are strongly recommended, but optional. Use the dimensions and size guidance in Collection Images.
The avatar represents your collection in most places on Scatter. The banner also serves as the large hero image on your collection homepage and when the collection is featured. Drag and drop each file into its upload area or click to choose a file.

Select Save Changes after editing your profile. The editor displays Unsaved Changes Detected while changes still need to be saved.
External Links
Add your Website, X, and Discord links so collectors can find your project's official channels. At least one active social account is recommended. The marketplace link displayed by the form is generated automatically and cannot be edited there.
Pixelated Artwork
Under Misc., enable Pixelated Artwork for low-resolution pixel art, such as 24×24 or 48×48 images, to preserve crisp pixel edges when enlarged. Leave it off for high-resolution artwork, including detailed pixel art or dithering that benefits from smooth scaling.
Custom Collection Themes
Scatter supports custom theming for your collection page. Themes let you control the visual presentation of your collection on the Scatter webapp, giving you the opportunity to make sure the entire minting, collecting, and trading experience for your collection matches your preferred visual identity.
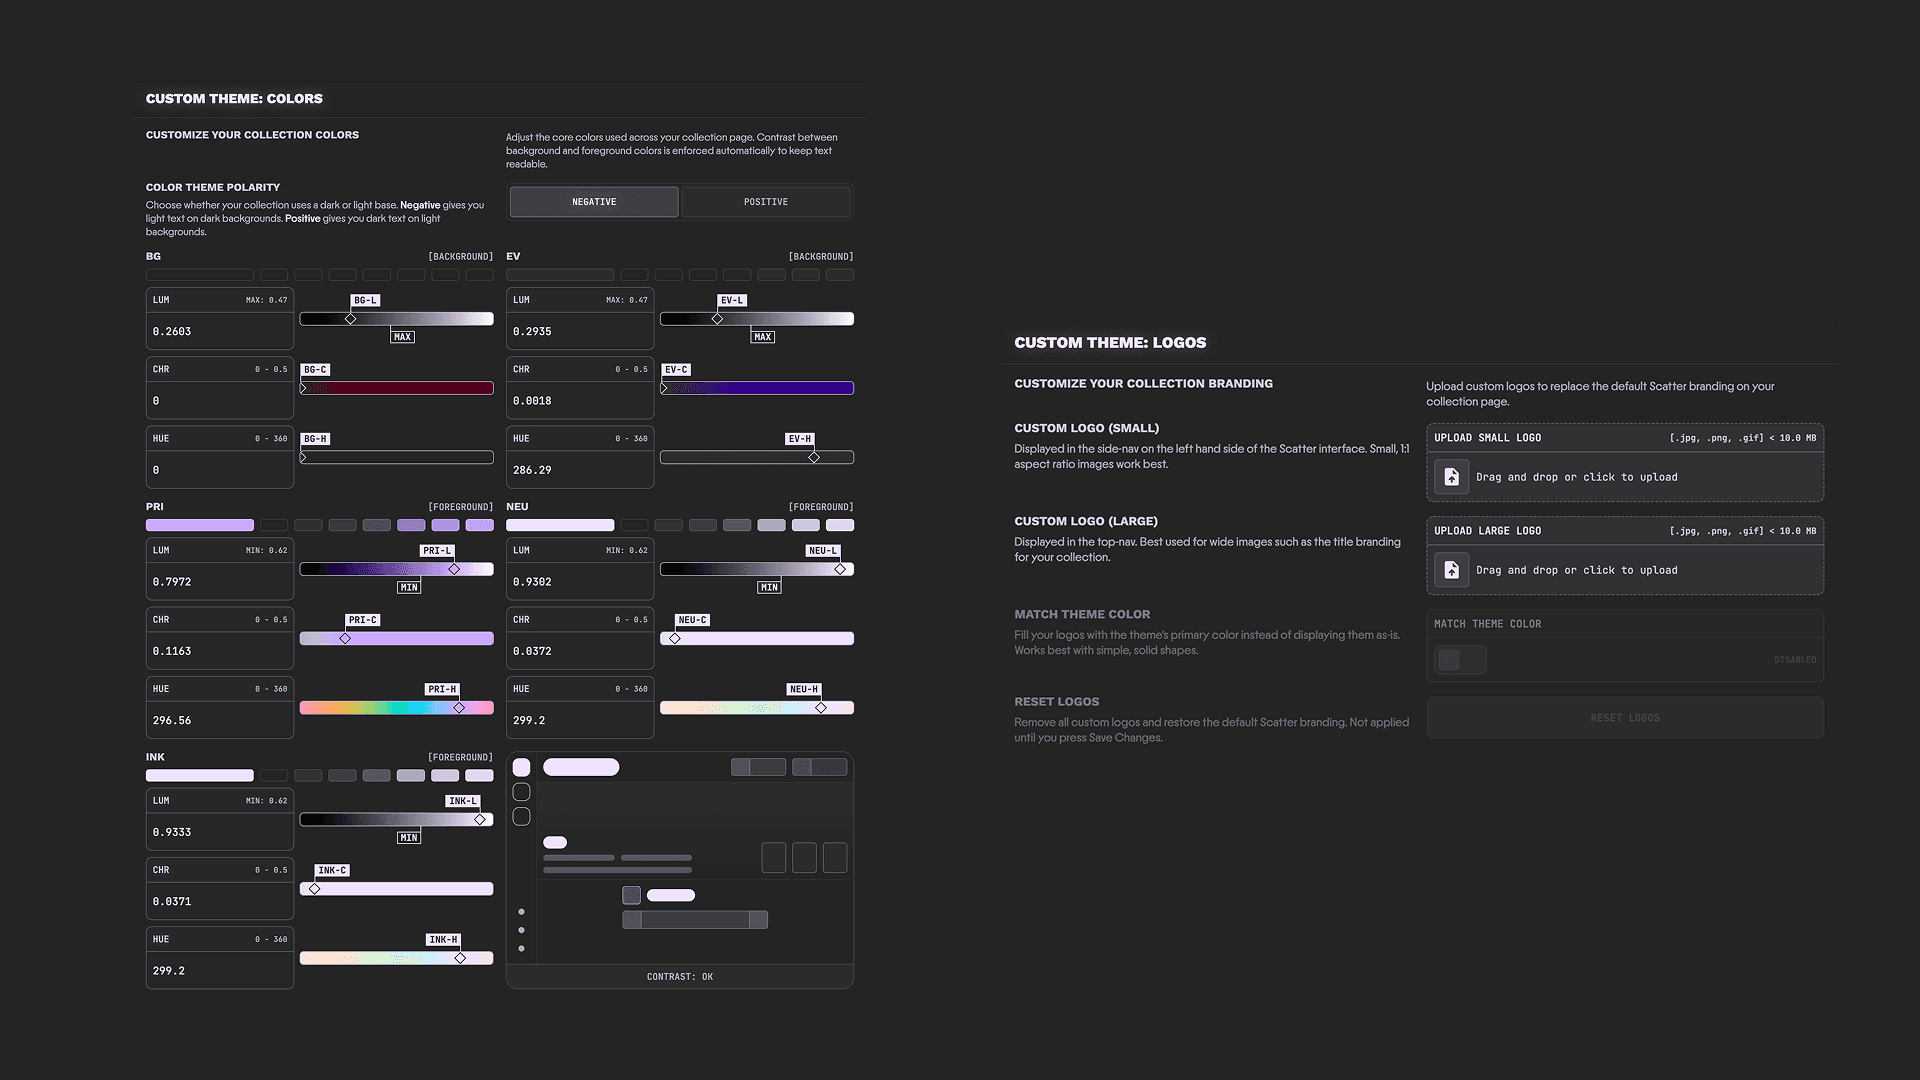
Scroll down on the Profile tab to find the Custom Theme sections for Color Themes and your collection's Theme Logos.
Custom Color Themes
You've probably never seen a color picker like this before — don't be overwhelmed! Scatter's custom theme color editor is uniquely designed to balance frictionless color picking (Overthinking-proof), readability (Impossible to create ugly, unreadable color schemes) and creative flexibility (Go wild with your colors!).
This is achieved through a few simple practices:
- We use the
OKLCH ↗
color space — a perceptually uniform color model that maps how humans
actually see color, not how screens produce it. If that all sounds like too
much, don't worry — it just means you can freely drag sliders around and your
theme will never end up with unreadable text or clashing contrast.
- LUM = Luminance: Think in terms of 'brightness', only better! This is the perceived intensity of the light used to mix your color. Generally speaking, the higher the LUM, the closer you get to pure, blinding white.
- CHR = Chroma: How vivid or saturated your color feels. Low chroma gives you muted, understated tones — crank it up and you get rich, punchy color. Zero chroma is pure gray.
- HUE = Hue: The actual color on the wheel — red, blue, green, and everything in between. This is the slider you can have the most fun with, because OKLCH ensures that shifting your hue preserves perceived brightness and contrast. Spin it freely — your theme stays readable no matter where you land.
Already have brand colors in hex? Convert them to OKLCH using oklch.com ↗ to visually explore the color space, or oklch.fyi ↗ for a quick straight conversion.
- The entire Scatter webapp is built with just 5 core colors in our unique
design system — 5 colors is all you need to customize your collection pages
any way you want! Each of the 5 colors has its own semantic purpose, but the
names are intentionally ambiguous. Don't worry about it! This is by design to
encourage you to experiment and be creative with your theme building. If
you're curious though...
- BG = "Background": The background color for every page, plays a big role in setting the tone for your custom theme.
- EV = "Elevation": Some elements need to give the impression they are visually slightly 'elevated' above the background — think Cards, NFT Specimen Thumbnails, etc. — that's what the EV color is for.
- PRI = "Primary": The star of the show, your 'hero' color. Generally this will be the loud, most intensely 'branded' color in your color theme. It's typically used as an 'accent' color to draw attention to key elements.
- NEU = "Neutral": Think of this like a little brother to PRI. It's a workhorse and constitutes the vast majority of the non-background coloring for your theme.
- INK = "Ink": The simplest to wrap your head around — is it text (or an icon)? If so, it uses the INK color!
Just 5 colors — endless possibilities.
-
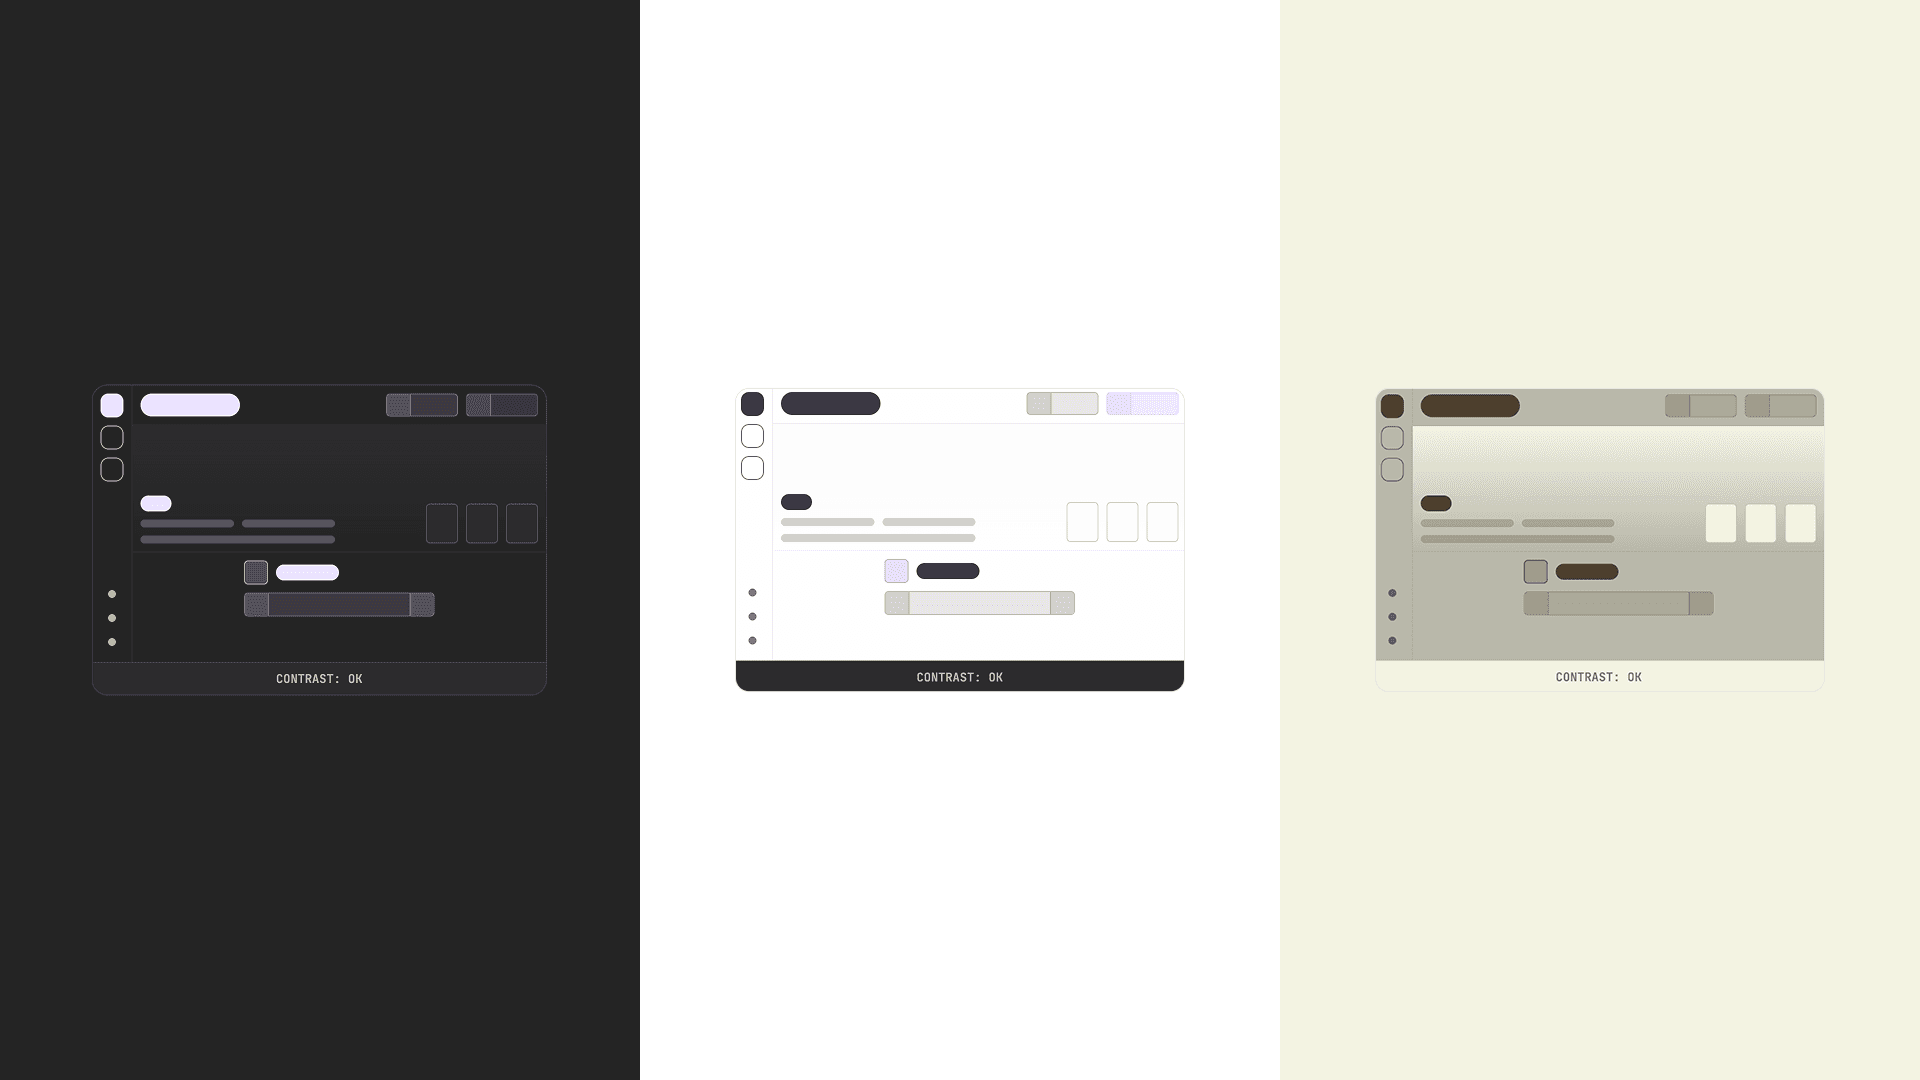
Readability is guaranteed — no matter what. You'll notice MAX and MIN flags on the Luminance sliders. These are guardrails — they prevent you from creating a theme where text blends into the background. You can drag your sliders as far as you want, but you can't cross those thresholds. That's the entire system. Go wild — Scatter won't let you make something unreadable.
The only choice you need to make is your Polarity:
- Polarity: Not every theme fits the "dark mode / light mode" split perfectly, so we think in terms of polarity instead. Negative means light text on dark backgrounds. Positive means dark text on light backgrounds. Pick whichever direction suits your vibe.
Your 5 colors are split into two groups for contrast purposes:
- Background group: BG + EV — your base layer.
- Foreground group: PRI, NEU, and INK — everything that sits on top.
In Negative polarity, background colors get a MAX luminance cap (they can't get brighter than the threshold), and foreground colors get a MIN floor (they can't get darker than the threshold). In Positive polarity, it's the reverse.
The one thing to keep in mind: the threshold is measured from the most extreme value in the opposite group. For example, say you're in Negative polarity and you set BG to 0.3 and EV to 0.5. The foreground MIN will be based on EV's 0.5 (the highest luminance in the background group), not BG's 0.3. This means if you push one background color brighter, the foreground minimums rise with it — keeping contrast intact automatically.
Use the live preview and its Contrast status when adjusting the colors. Reset Colors returns the sliders to their defaults; your saved theme is only updated when you select Save Changes.
Custom Logos
Upload your own logos to replace the default Scatter branding on your collection page. If you don't upload custom logos, Scatter's default branding will automatically adapt to your theme colors — so your page will look cohesive either way.
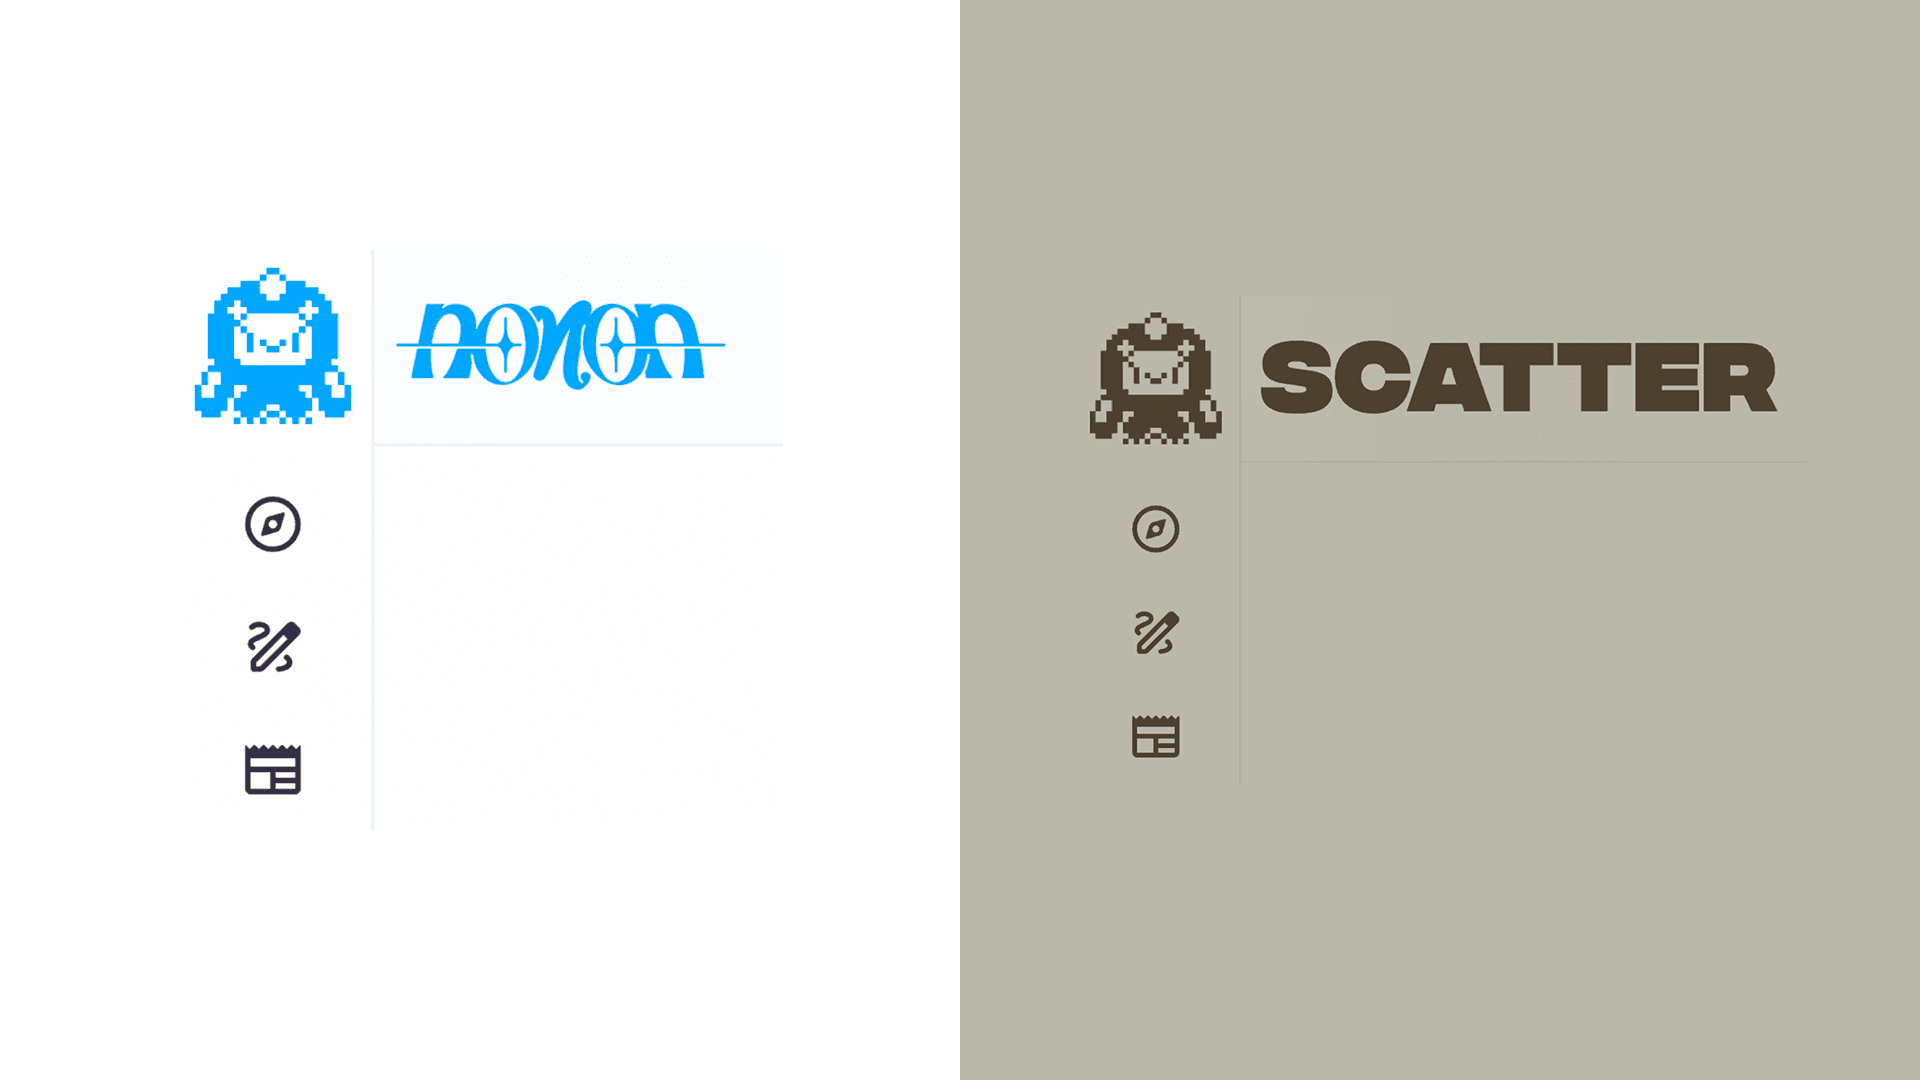
- Small Logo: Displayed in the side-nav on the left hand side of the Scatter interface. Small, 1:1 aspect ratio images work best.
- Large Logo: Displayed in the top-nav. Best used for wide images such as the title branding for your collection.
- Match Theme Color: When enabled, your logos are automatically filled with your theme's PRI (Primary) color instead of displaying as-is. Works best with simple, solid shapes — perfect for flat icons or clean wordmarks. Use a transparent background, such as a transparent PNG: all visible pixels are recolored.
- Reset Logos: Removes all custom logos and restores the default Scatter branding. Not applied until you press Save Changes.
See Collection Images for logo formats, proportions, and file-size limits. When you are happy with your profile, colors, and logos, click Save Changes.
Collection Visibility
Collections are hidden by default. When everything is set up and you are ready to publish your collection page, enable Public Visibility and click Save Changes. We recommend uploading your media and setting up minting first and coming back to enable this when you are ready.
A hidden collection displays a notice at the top of the Profile tab. Turning Public Visibility off hides the collection from public view again; save the change to apply it.
Public Visibility controls whether your collection page is public. It is separate from when NFT metadata is revealed.

NSFW Collections
Enable NSFW Collection if the collection contains sexually explicit or other age-restricted material. It is viewable only by signed-in adults who enable Show NSFW Collections in their account settings.
Once the NSFW classification is enabled, only a Scatter admin can remove it. Contact Scatter if the classification needs to be removed.
Collection Info
Open the Info tab to review your collection's details. The collection header also shows its contract address with a copy control and a network badge. Use the address and network when identifying the contract.
| Section | Information shown |
|---|---|
| General | Name, symbol, description, contract address, contract owner, blockchain network, contract type, Base URI, and Archetype Version. |
| Minting | Total Minted, Max Supply, and Max Batch Size. |
| Discounts | Shill Discount and Mint Tiers Discounts. |
| Payouts | Minting payout percentages, such as the Owner and Platform shares. |
Check these values for your own collection. Max Batch Size refers to minting, rather than marketplace bulk-buy or bid limits. See Contract Types for the relevant contract controls.
The Base URI is the base address used for NFT metadata. Collections using Scatter's uploader can show a Scatter-hosted metadata address; see Revealing on Mint for how metadata access works before tokens are minted.
The Payouts section shows minting percentage shares, not a claimable balance or the marketplace royalty split. Use Minting Fees and Minting Shills to understand those shares, and Payouts for withdrawing mint proceeds.
Collection Announcements
Use the Announcements tab to publish updates that are shown to your collection's holders on Scatter. You can use them for collection news, release updates, or reveal plans.
- Open Announcements in Collection Management. Before the first post, the tab displays No announcements yet.
- Select Create New Announcement.
- Enter a Title and Content. Add a Link (Optional) if the update needs a related page.
- Review the text and any link, then select Publish Announcement.
The published entry appears in the management list with its title, publication date, and content. Each entry has a trash icon for removing the announcement.
Know the Other Settings
You will also see these tabs in the editor:
- Info: The collection and contract summary.
- Media: Opens the media workspace, with Editor, Config, Tools, and Issues tabs for uploading and managing content.
- Marketplace: Manage market currency and payment configuration and review volume, affiliate earnings, and royalty earnings charts.
- Mint Lists: Configure who can mint, when, and at what price.
- Burn Lists: Configure burn-to-mint.
- Shills: Configure minting shill eligibility, fees, and discounts.
- Announcements: Publish updates for your collection's holders.
- Contract: Contract controls for metadata, payouts, supply, batch minting, and ownership.
Next Step
Continue with Uploading Content.