Uploading Your Content to Scatter
Uploading your media via Scatter is the recommended way to launch a collection and Scatter's only managed hosting solution. It handles hosting for you and lets you edit traits directly in the UI. You do not need to write JSON, change the Base URI, or pay for a hosting provider.
If you are an advanced user and want to host yourself, you can skip this step and change your Base URI in the Contract tab.
Before you start, deploy your collection, follow Prepare Your Files, and configure your Collection Profile & Branding.
Media Workspace
Open Media in Collection Management, at
https://www.scatter.art/c/<collection-slug>/edit/media. It has its own set of
tabs:
| Tab | What it is for |
|---|---|
| Editor | Add a folder, review token media and metadata, and work with token IDs. |
| Config | Set a metadata name prefix and shared description. |
| Tools | Prepare an initial upload or update, download, and reset existing collection files. |
| Issues | Review problems detected by the uploader. |
Use the back chevrons beside these tabs to return to the main collection management tabs.
Preparation
Use the shared file checklist and numbering rules. Keep a backup before making changes to existing media or metadata.
Upload Layout
In Editor, drag an unzipped folder into the drop zone. Put media and any matching JSON metadata together in that folder, named by token ID:
| Token ID | Example media file | Optional metadata file |
|---|---|---|
| 1 | 1.png | 1.json |
| 2 | 2.png | 2.json |
The uploader parses the media and metadata automatically. Metadata files are optional; missing metadata is generated for you. For a media-only upload, the folder can contain just the numbered media files. See File Names and Token IDs for the shared numbering rules.
Video and Preview Images
The Uploader currently does not combine a static image and a video into one
token's image and animation_url fields. Adding both 1.png and 1.mp4
does not pair them as a preview and animation for token ID 1; it can produce
separate entries with a Duplicate token ID error.
For a token that needs both, prepare custom metadata with the preview URL in
image and the video URL in animation_url, and host the media and metadata
yourself. See Video NFTs and
Self-Hosting (Advanced). This metadata format works
with Scatter; automatic pairing of the two local media files is the Uploader
limitation.
Uploading Media
After adding the folder in Editor, review the token previews and IDs to make sure the intended artwork and metadata match. The toolbar includes ascending and descending ID sorting controls.
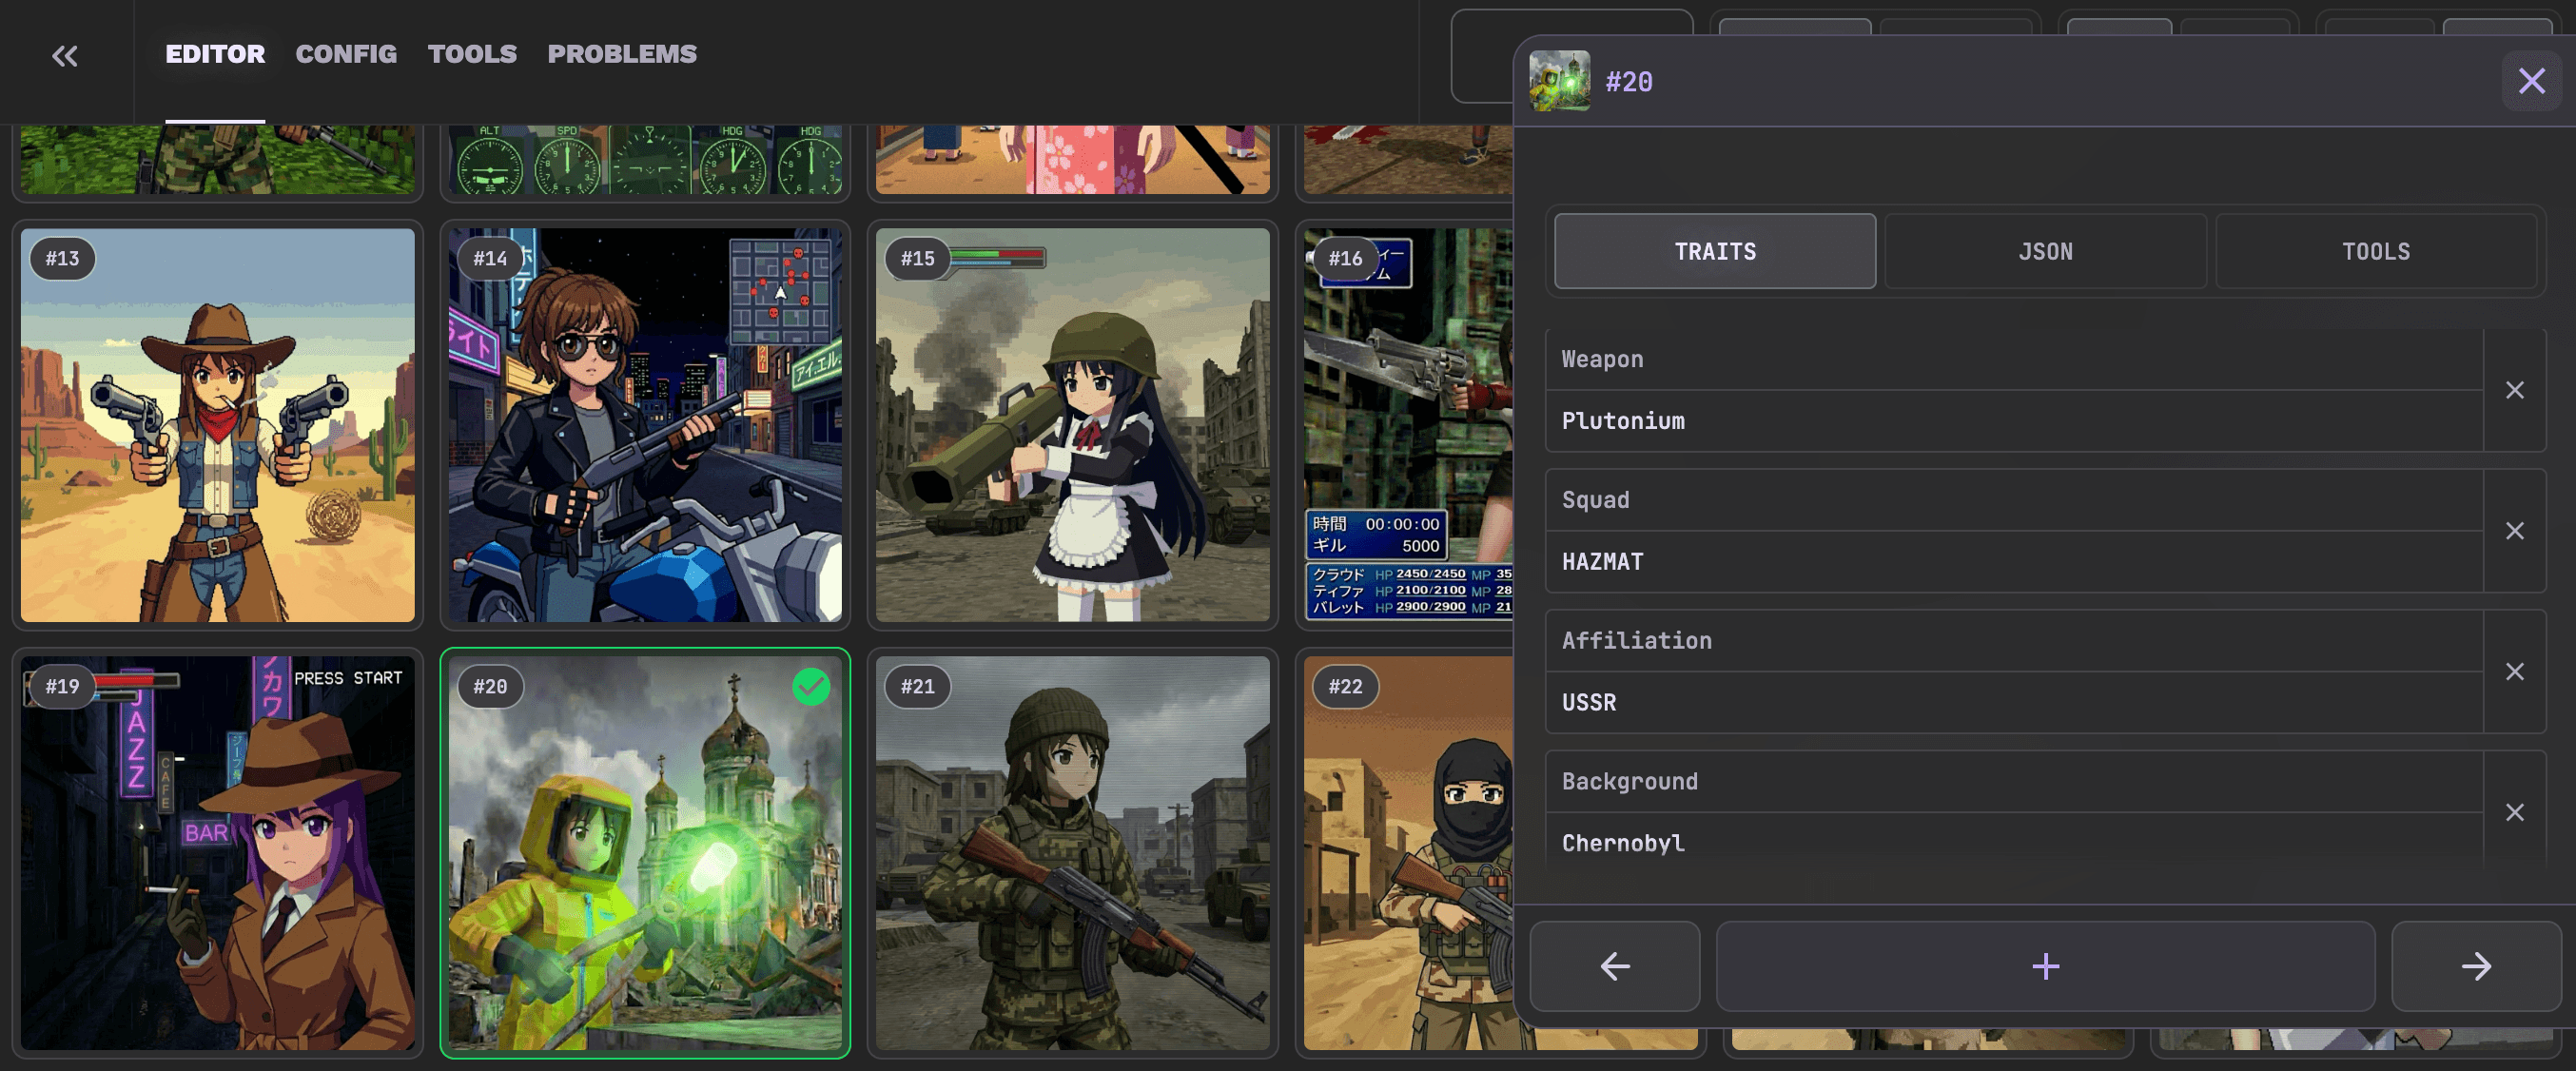
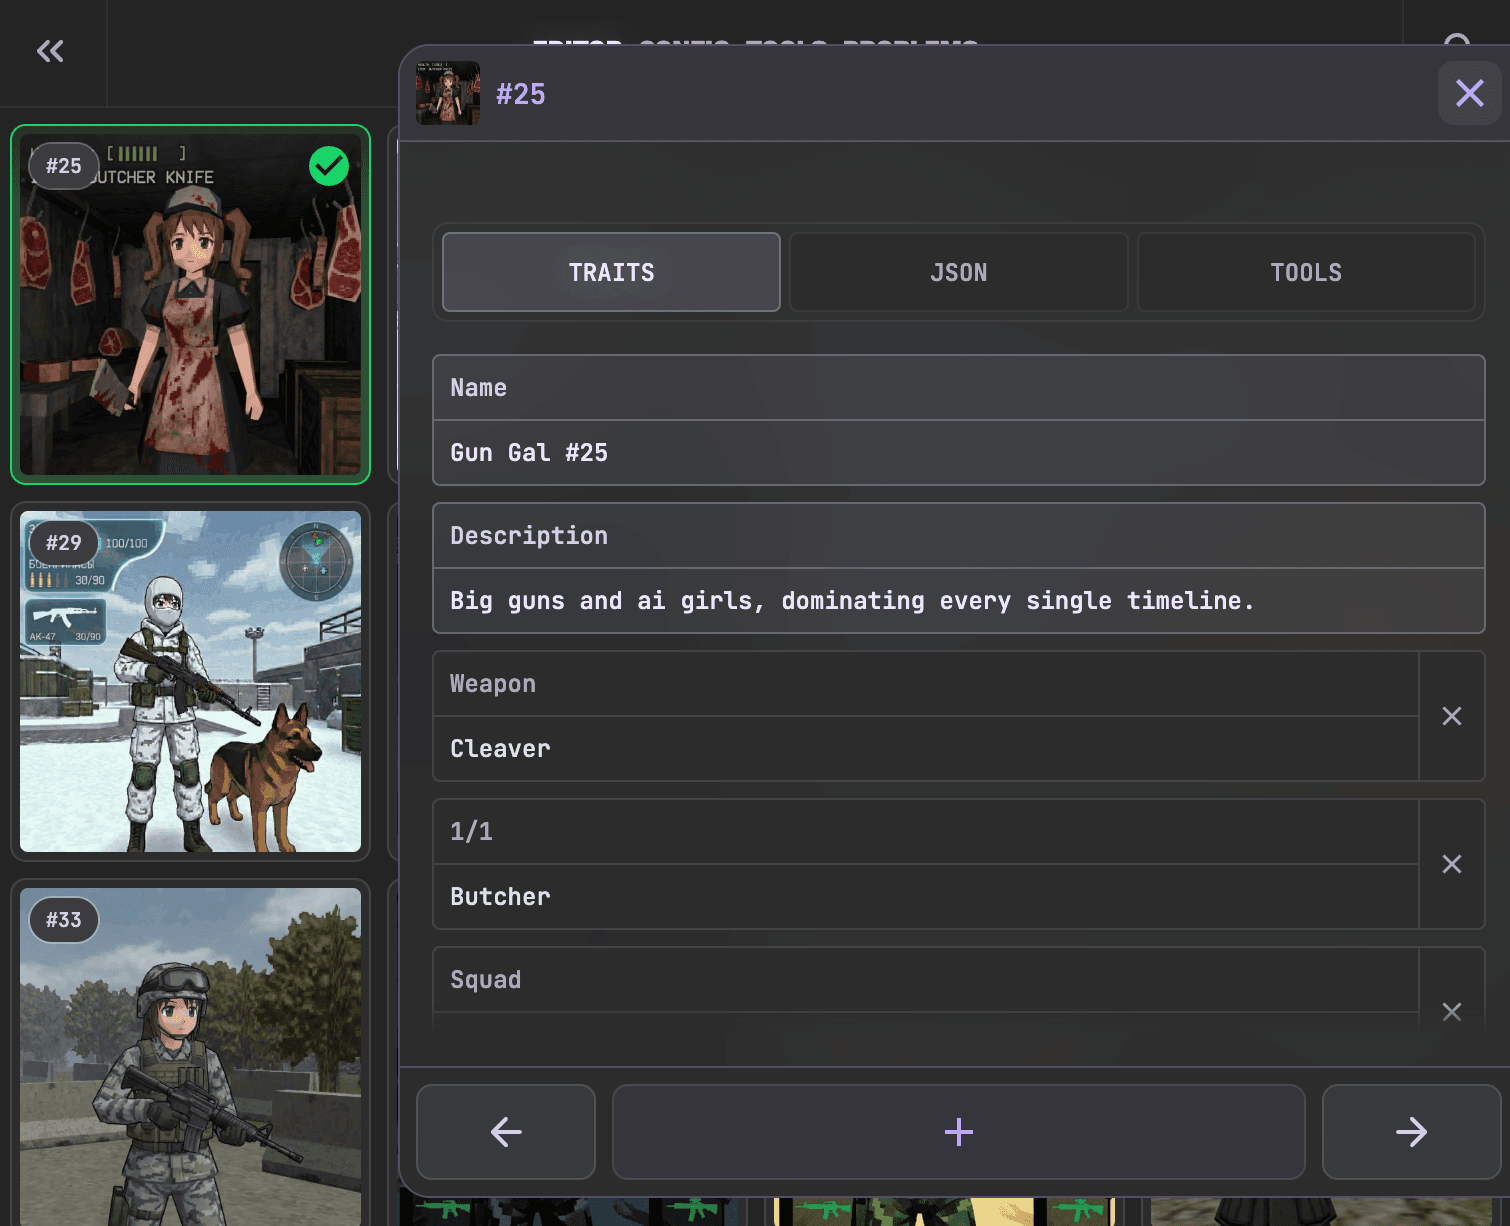
Select a token to open its detail panel. Review its media preview and the Traits, JSON, and Tools tabs. You can edit its name and description through the Edit Name and Edit Description dialogs, then select Save. These are token metadata fields, separate from the collection profile.
Review Issues and Token Warnings before selecting Upload. While Uploading Media is in progress, keep the page open and do not refresh it. Wait for the upload to finish before leaving.
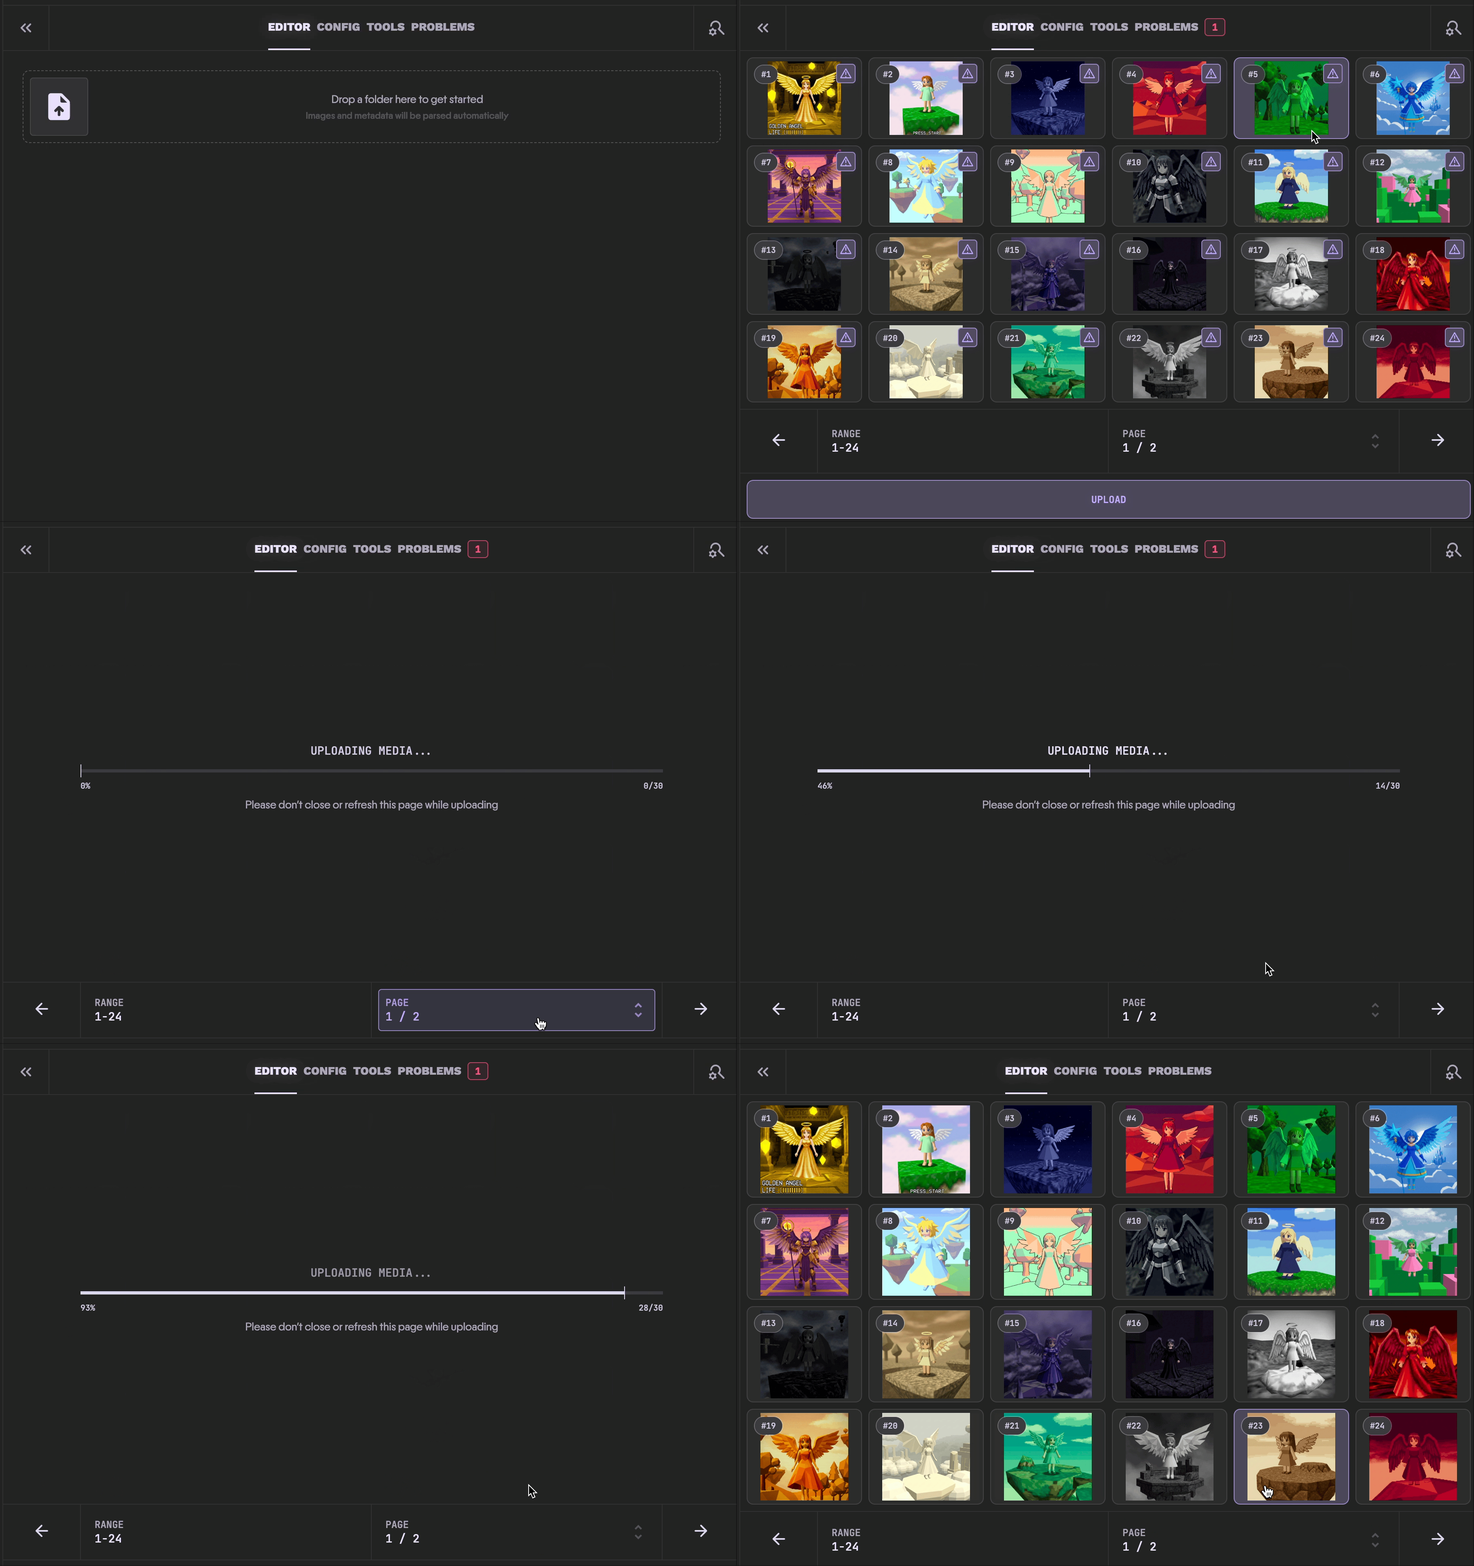
Metadata Options
You can upload with metadata or without it.
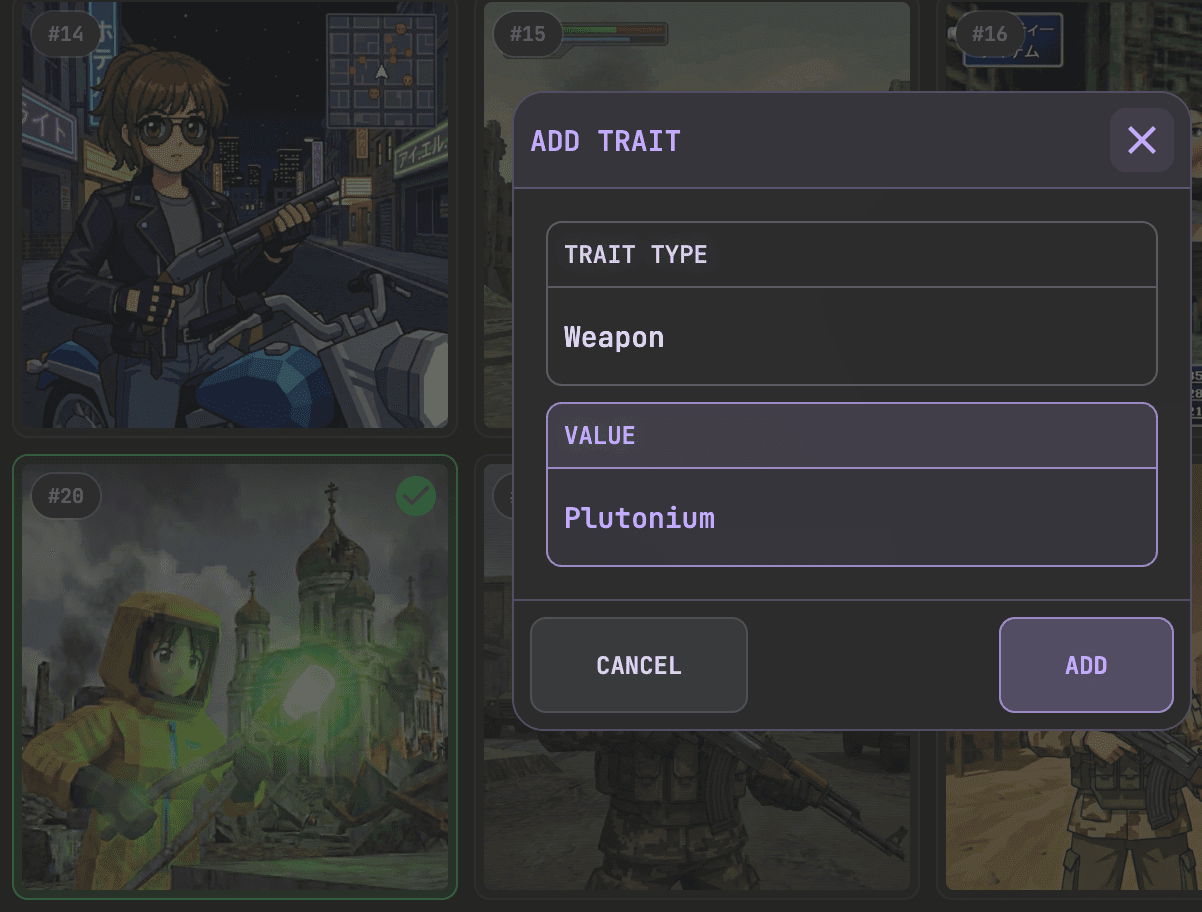
- Without metadata: Uploader generates metadata on the spot for each media file. You can edit traits by clicking each token.
- With metadata: Supply your own JSON files, then edit or fine-tune traits as needed. Keep each JSON file beside its matching media in the upload folder.
Use the shared trait guidance when editing metadata so trait types stay consistent.
Collection-Wide Settings
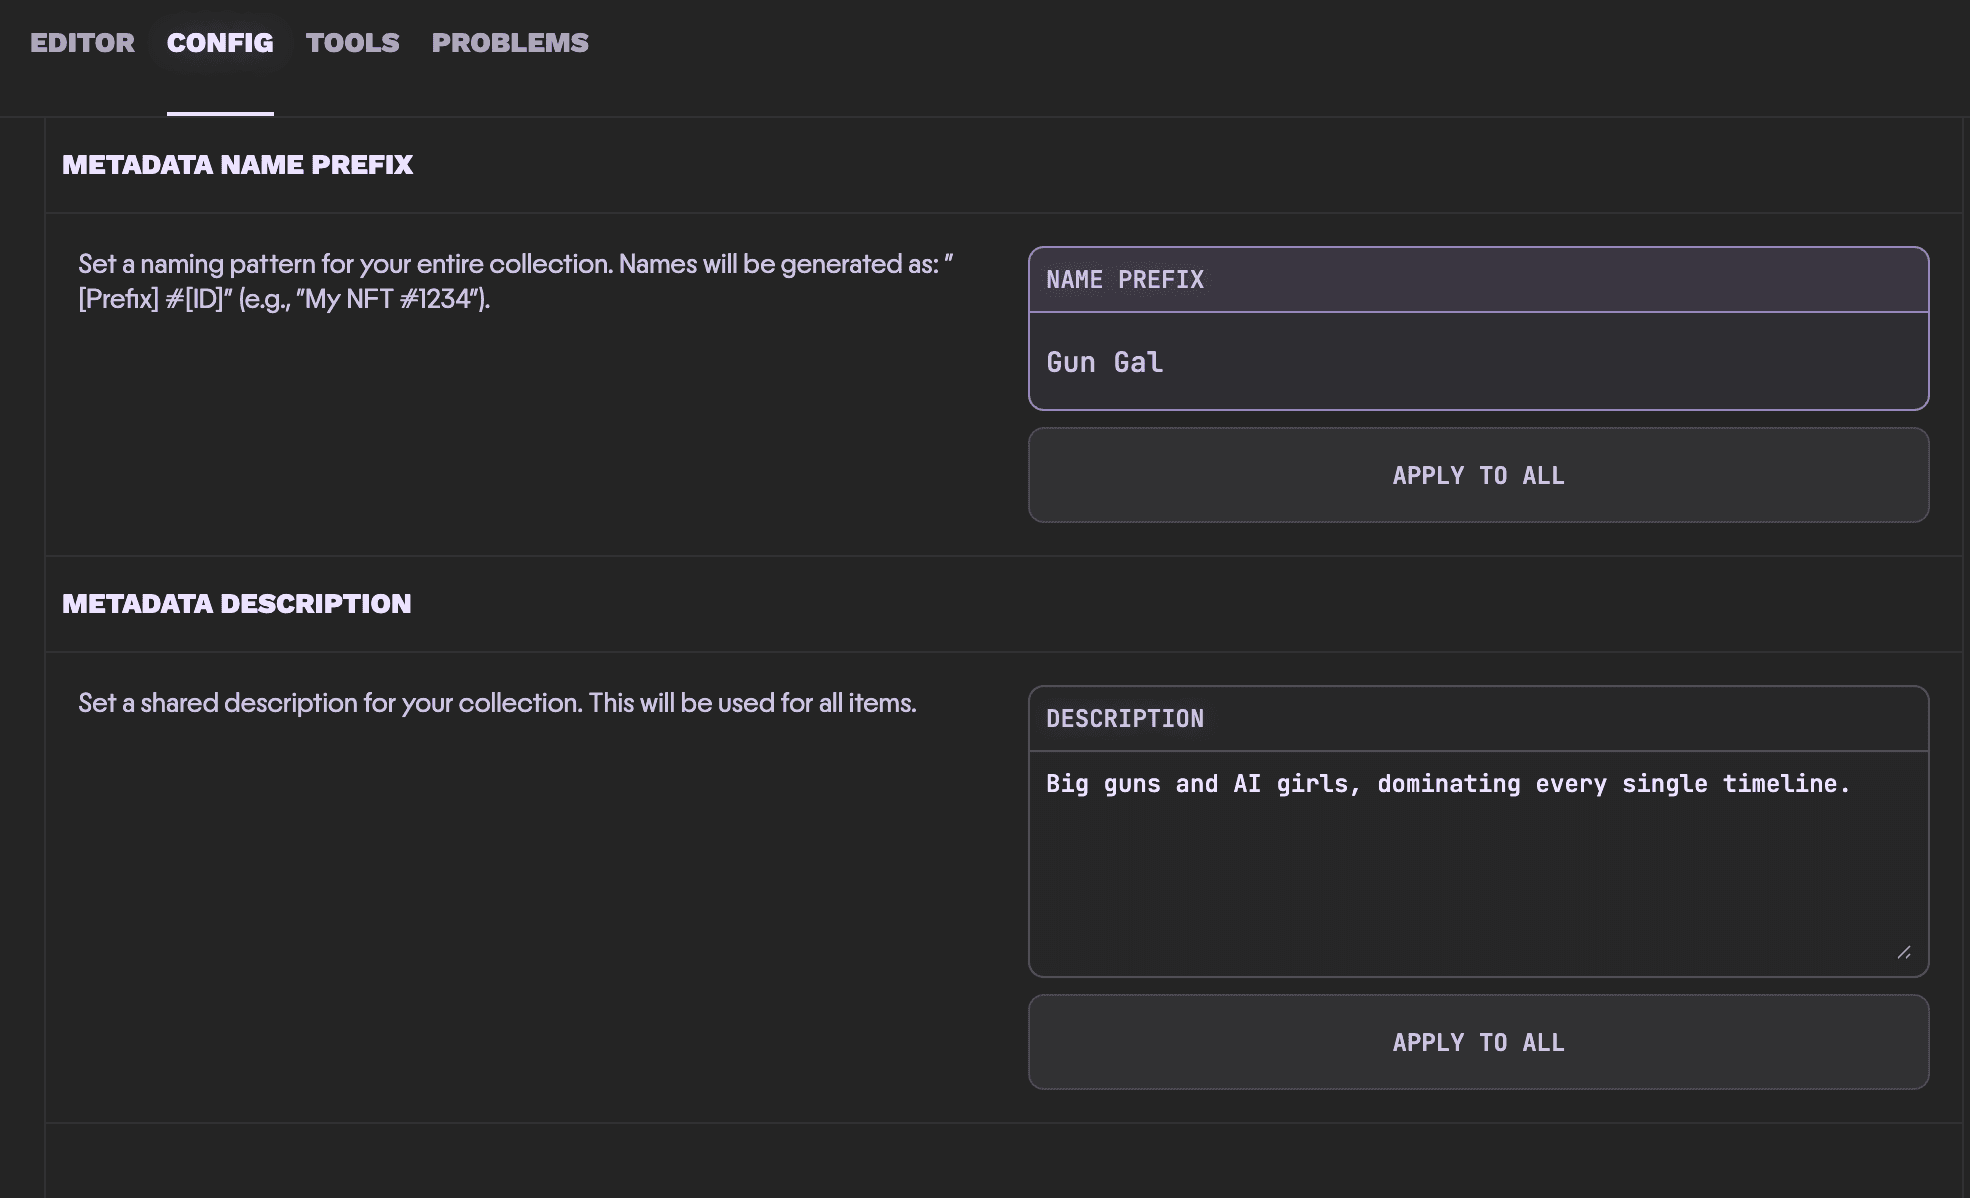
Under Config, use Metadata Name Prefix to generate token names in the
form [Prefix] #[ID], such as My NFT #1234. Metadata Description sets a
shared description for the collection's items.
Enter the prefix or description and use its Apply to All button to apply the shared value. Review individual token names and descriptions afterward, especially if some items need different values.
If a control says No Tokens Selected, load your files and select the tokens in Editor before using it. Review the selected tokens when applying shared metadata changes. These token metadata fields are separate from your collection's public display name and description.
Token Tools
When a token is selected, you can:
- View its JSON.
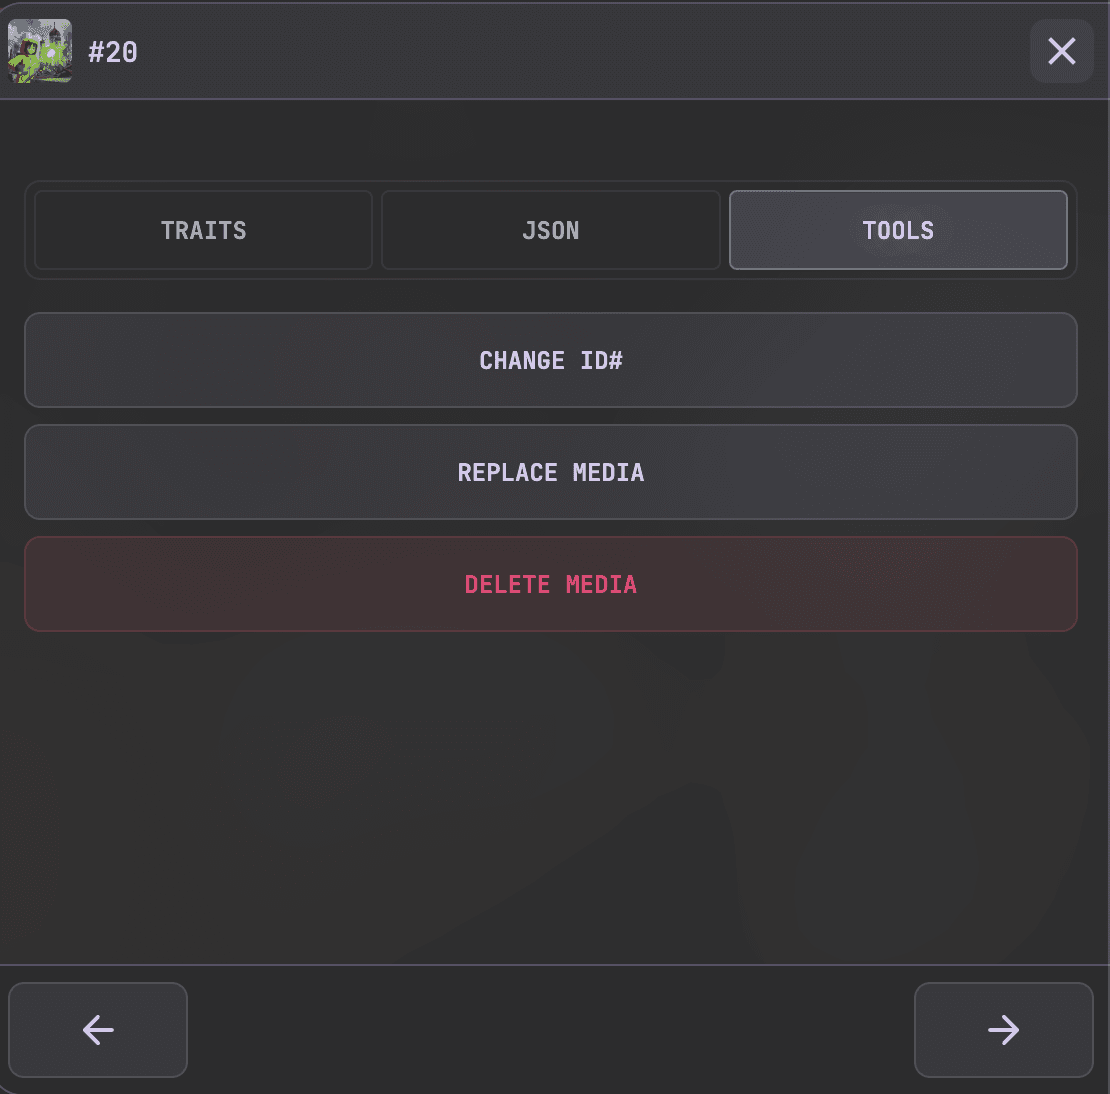
- Use Change ID# to change its ID in the editor. Review the From → To preview before confirming; a conflicting entry can shift to the next available ID. Check the resulting IDs and metadata names afterward.
- Use Add Media for an entry with no media, or Replace Media to change its file.
- Use Delete Media to remove its media while preserving its metadata. The confirmation warns that the deletion cannot be undone; keep a backup. The entry will need media again before it is ready to upload.
Changing an editor ID changes which token that content is assigned to. Check existing token mappings carefully when editing an already launched collection.
Issues and Token Warnings
The Issues tab shows detected problems and an issue-count badge. Individual tokens also show Token Errors or Token Warnings in their detail panel. When nothing is reported, Issues displays No problems detected.
| Message | What to check |
|---|---|
| Duplicate token ID | Two editor entries have the same ID. Correct the assignment; two media files with the same ID are not automatically combined into one token. |
| Missing media file | The entry has metadata but no media. Use Add Media or correct your import. Deleting media preserves metadata, so it can leave this error. |
| Default metadata generated because metadata was missing | Review the generated name, description, and traits, or supply your own metadata. |
| Metadata duplicated with another token | Review both tokens' metadata and correct unintended duplicates, including names. |
| Excess Files | The uploaded entries exceed the contract's configured supply. Review the intended IDs and supply; extra uploaded entries do not increase what the contract can mint. |
Fix errors and review warnings before uploading. Assigning a second ID to a video or image makes it a separate token entry; it does not turn it into the other token's preview or animation.
Shuffle Tokens
Under Tools, Shuffle Tokens randomly reassigns token IDs before uploading. Each token's media and metadata stay together when its ID changes. Use this when you want to randomize the minting order, then review the new IDs in Editor.
Shuffling clears any saved upload progress. Keep a backup of your source files and decide on the order before starting the upload.
Clear Loaded Files
Under Tools, Clear Files removes the files you dragged into the browser so you can start over. It also discards media and metadata edits made in this tool. Keep copies of changes you want to retain before clearing the files.
Smart Uploads and Maintenance
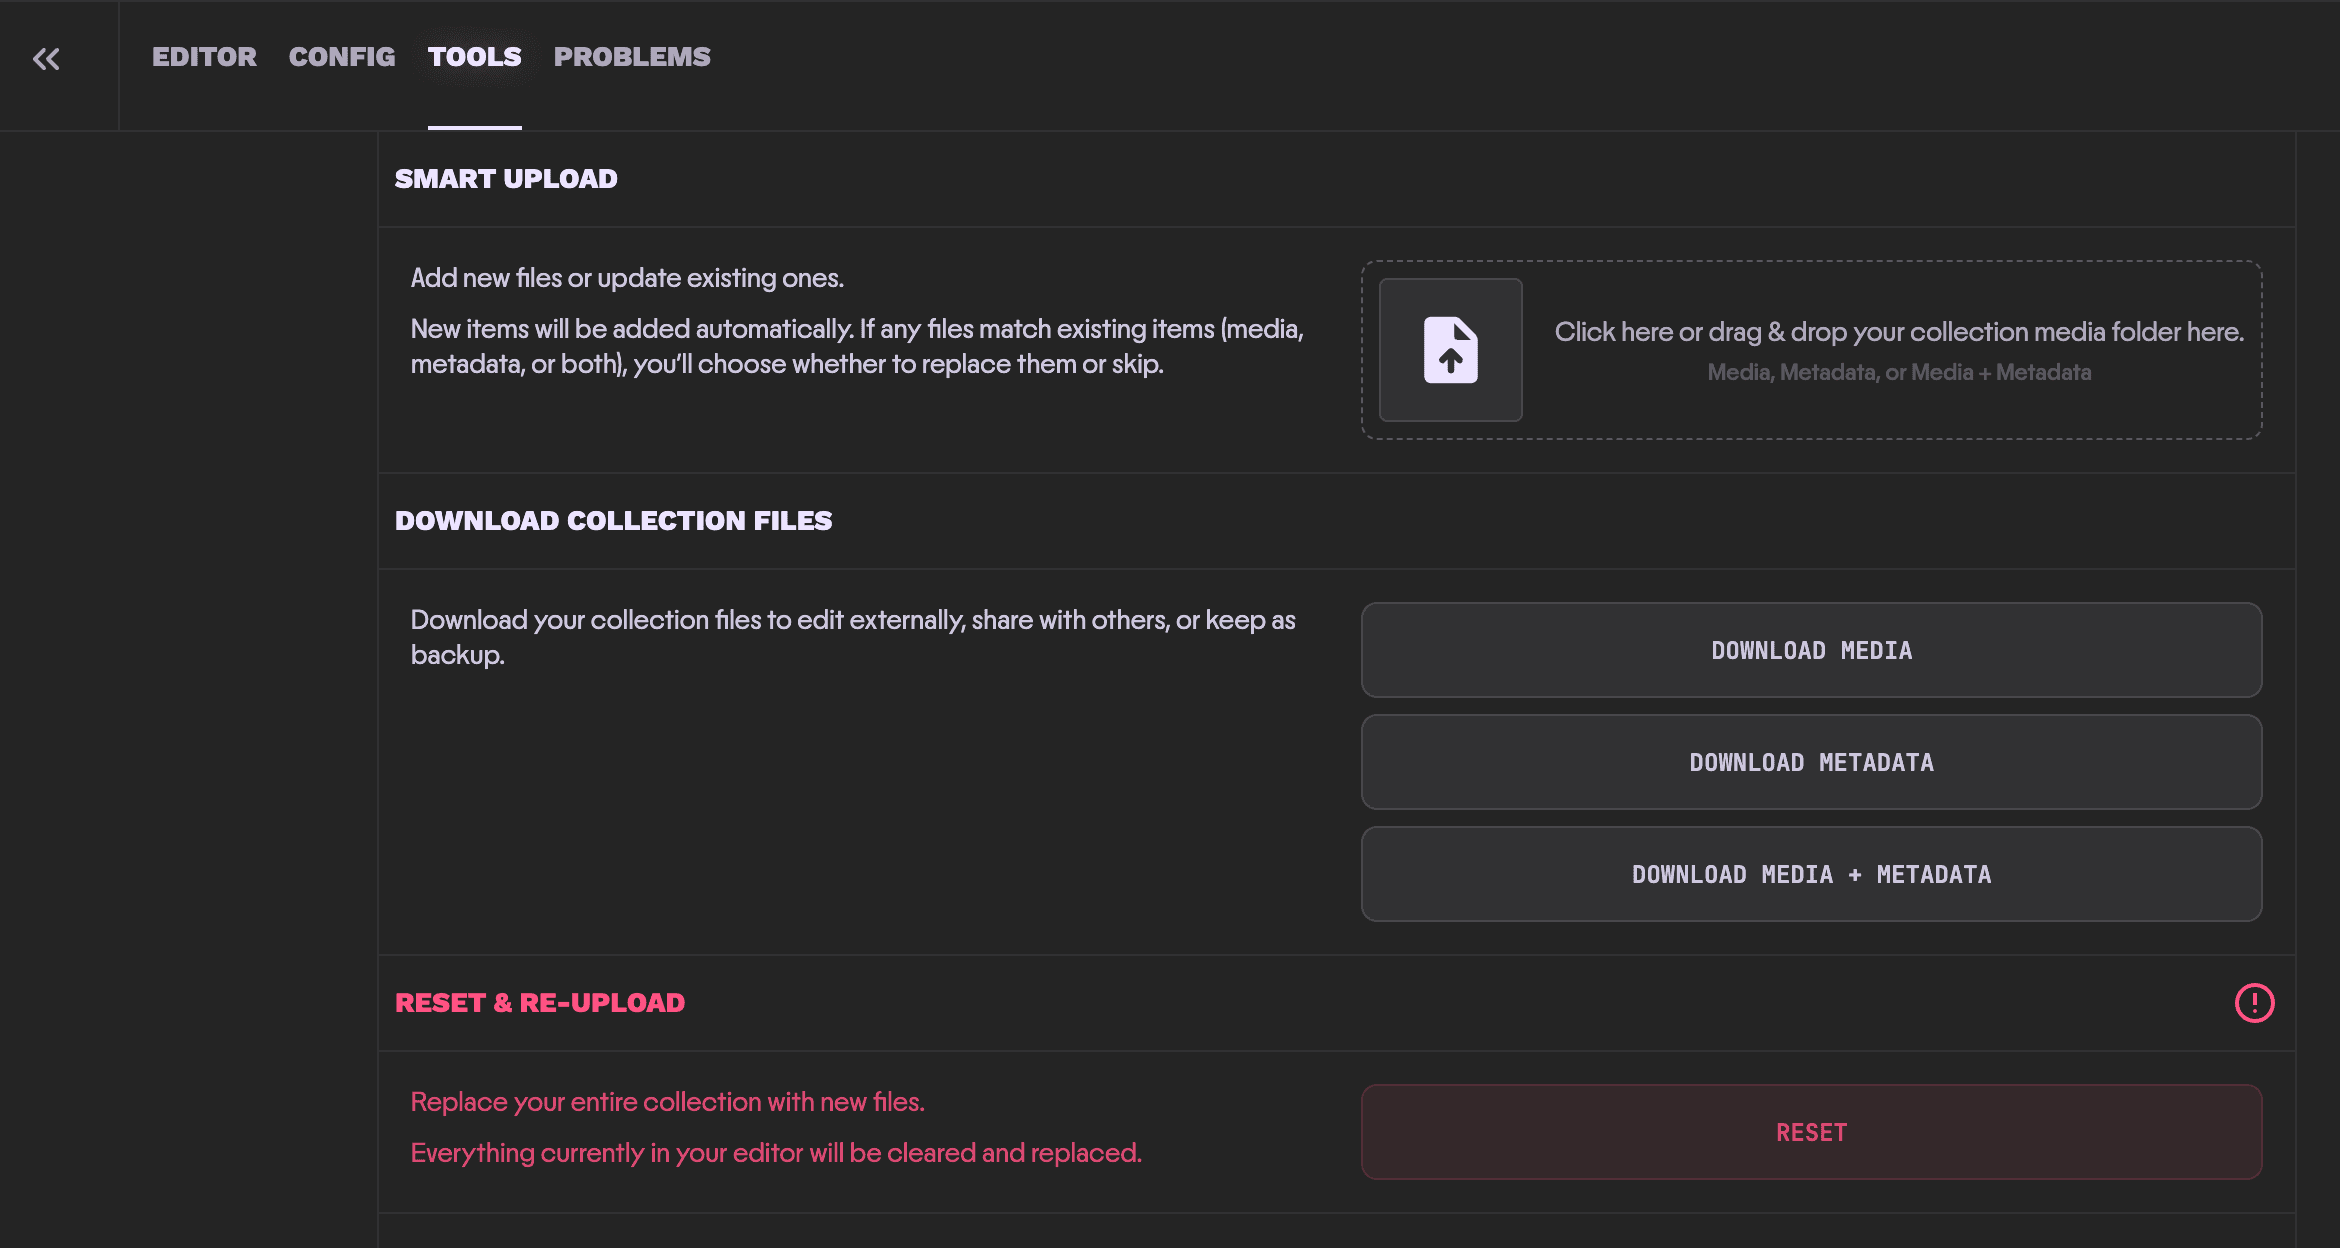
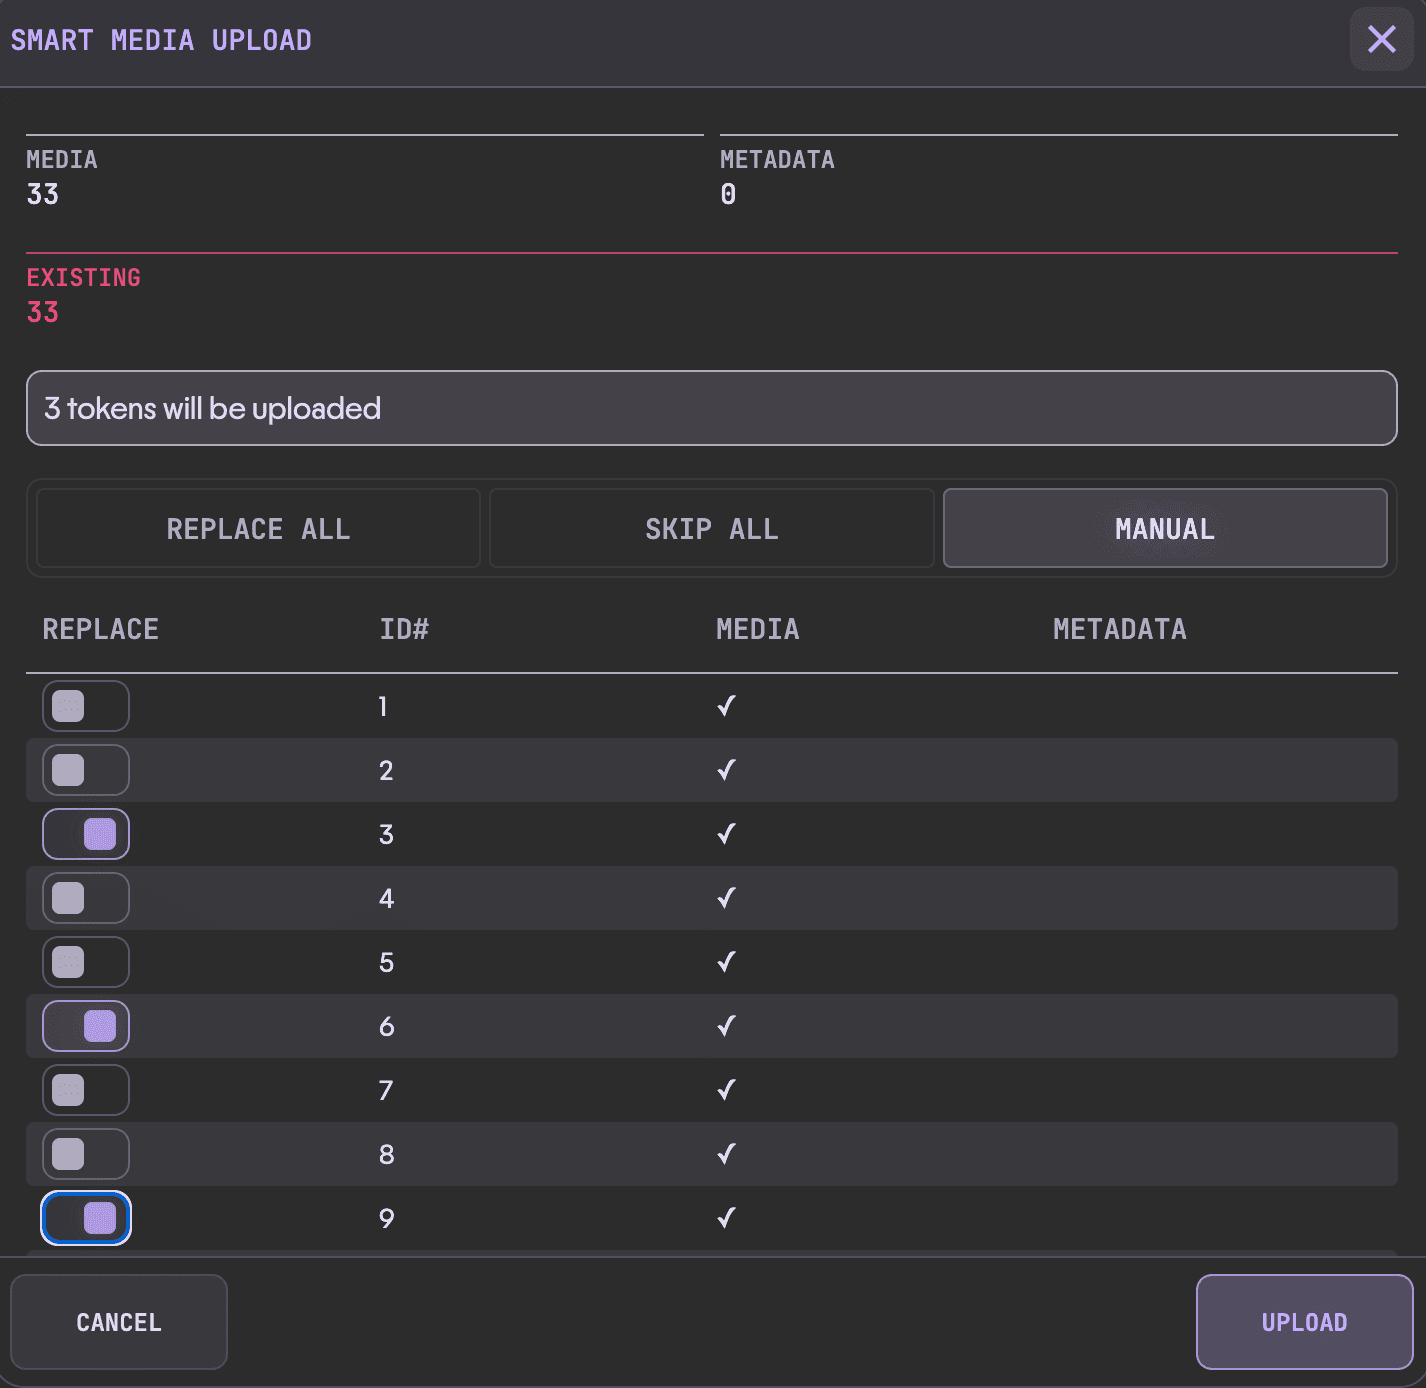
You can add more media or metadata after the initial upload. When working with existing content, open Tools → Smart Upload and click or drop your collection folder into the drop zone. It accepts media, metadata, or both. New items are added automatically; when files match existing media or metadata, choose whether to replace or skip them.
- Upload in batches. If your collection is 3,000 tokens but only 1,000 are ready, upload the first 1,000 and add the rest later.
- If you want to increase collection size, update Max Supply in the Contract tab first, then upload the new files.
- Replace All replaces every conflicting token ID in the new upload.
- Skip All ignores conflicts when file numbers already exist.
- Manual lets you choose which conflicting token IDs to replace.
Download Collection Files
Under Tools → Download Collection Files, choose Download Media, Download Metadata, or Download Media + Metadata. Use these to keep a backup, edit files externally, or share the collection files with collaborators. Download a backup before replacing or resetting existing content.
Reset
Under Tools → Reset & Re-Upload, Reset starts the workflow for replacing the entire collection with new files. The editor warns that everything currently in it will be cleared and replaced. Use Smart Upload for targeted updates, and keep a downloaded backup before resetting.
This is separate from Clear Files, which discards the files and edits loaded into the browser during upload preparation.
Revealing on Mint
Scatter supports instant reveal on mint: an NFT's metadata is not accessible until that token is minted. Creators can prepare their final artwork and metadata before launch, and collectors receive the reveal when they mint.
This is different from publishing the collection page under Public Visibility, and from a delayed reveal where already-minted NFTs initially show a shared placeholder.
The existing manual delayed-reveal guide covers self-hosted metadata and changing a base URI. It is not the setup for Scatter's instant reveal on mint. A Scatter-hosted placeholder/reveal-later procedure is not documented here until its controls and behavior have been verified.
Self-Hosting (Advanced)
The Scatter Uploader is Scatter's only managed hosting solution. Advanced users who need IPFS must be able to manage, pin, and troubleshoot their content independently. See IPFS Self-hosting for the requirements. If you need a guided hosting workflow, use the Scatter Uploader.
Next Step
Continue with Mint Lists.